Why not just wait for the Steam Machine?
When Valve announced the Steam Machine in the fall of 2025, I put my name on the waitlist like a lot of other people. But the more I thought about it, the less sense waiting made. At a minimum of $1,050 without a controller, the Steam Machine wasn’t exactly an impulse buy, and a couple of things kept nagging at me:
- For that kind of money, I could build something more capable than the Steam Machine itself.
- The Steam Machine is built around custom, largely non-upgradeable hardware. Buy it today, and you’re waiting on Valve to decide when (or if) a “Steam Machine 2” ever shows up. Build your own, and you upgrade the GPU or RAM whenever you want.
The deciding factor, though, was SteamOS 3.8, which Valve released alongside the Steam Machine announcement specifically to support non-Valve hardware. I’ve been a Steam Deck owner for years and a believer in SteamOS the whole time. It’s a genuinely great couch/handheld experience. The idea of getting that same experience on a 65" TV with desktop-class hardware behind it was the real hook. I also knew it would give me access to Steam Link, which lets me tap into this PC’s resources for remote play from my Steam Deck. More on how well that actually works later.
So instead of waiting on Valve, I built my own Steam Machine.
Parts List
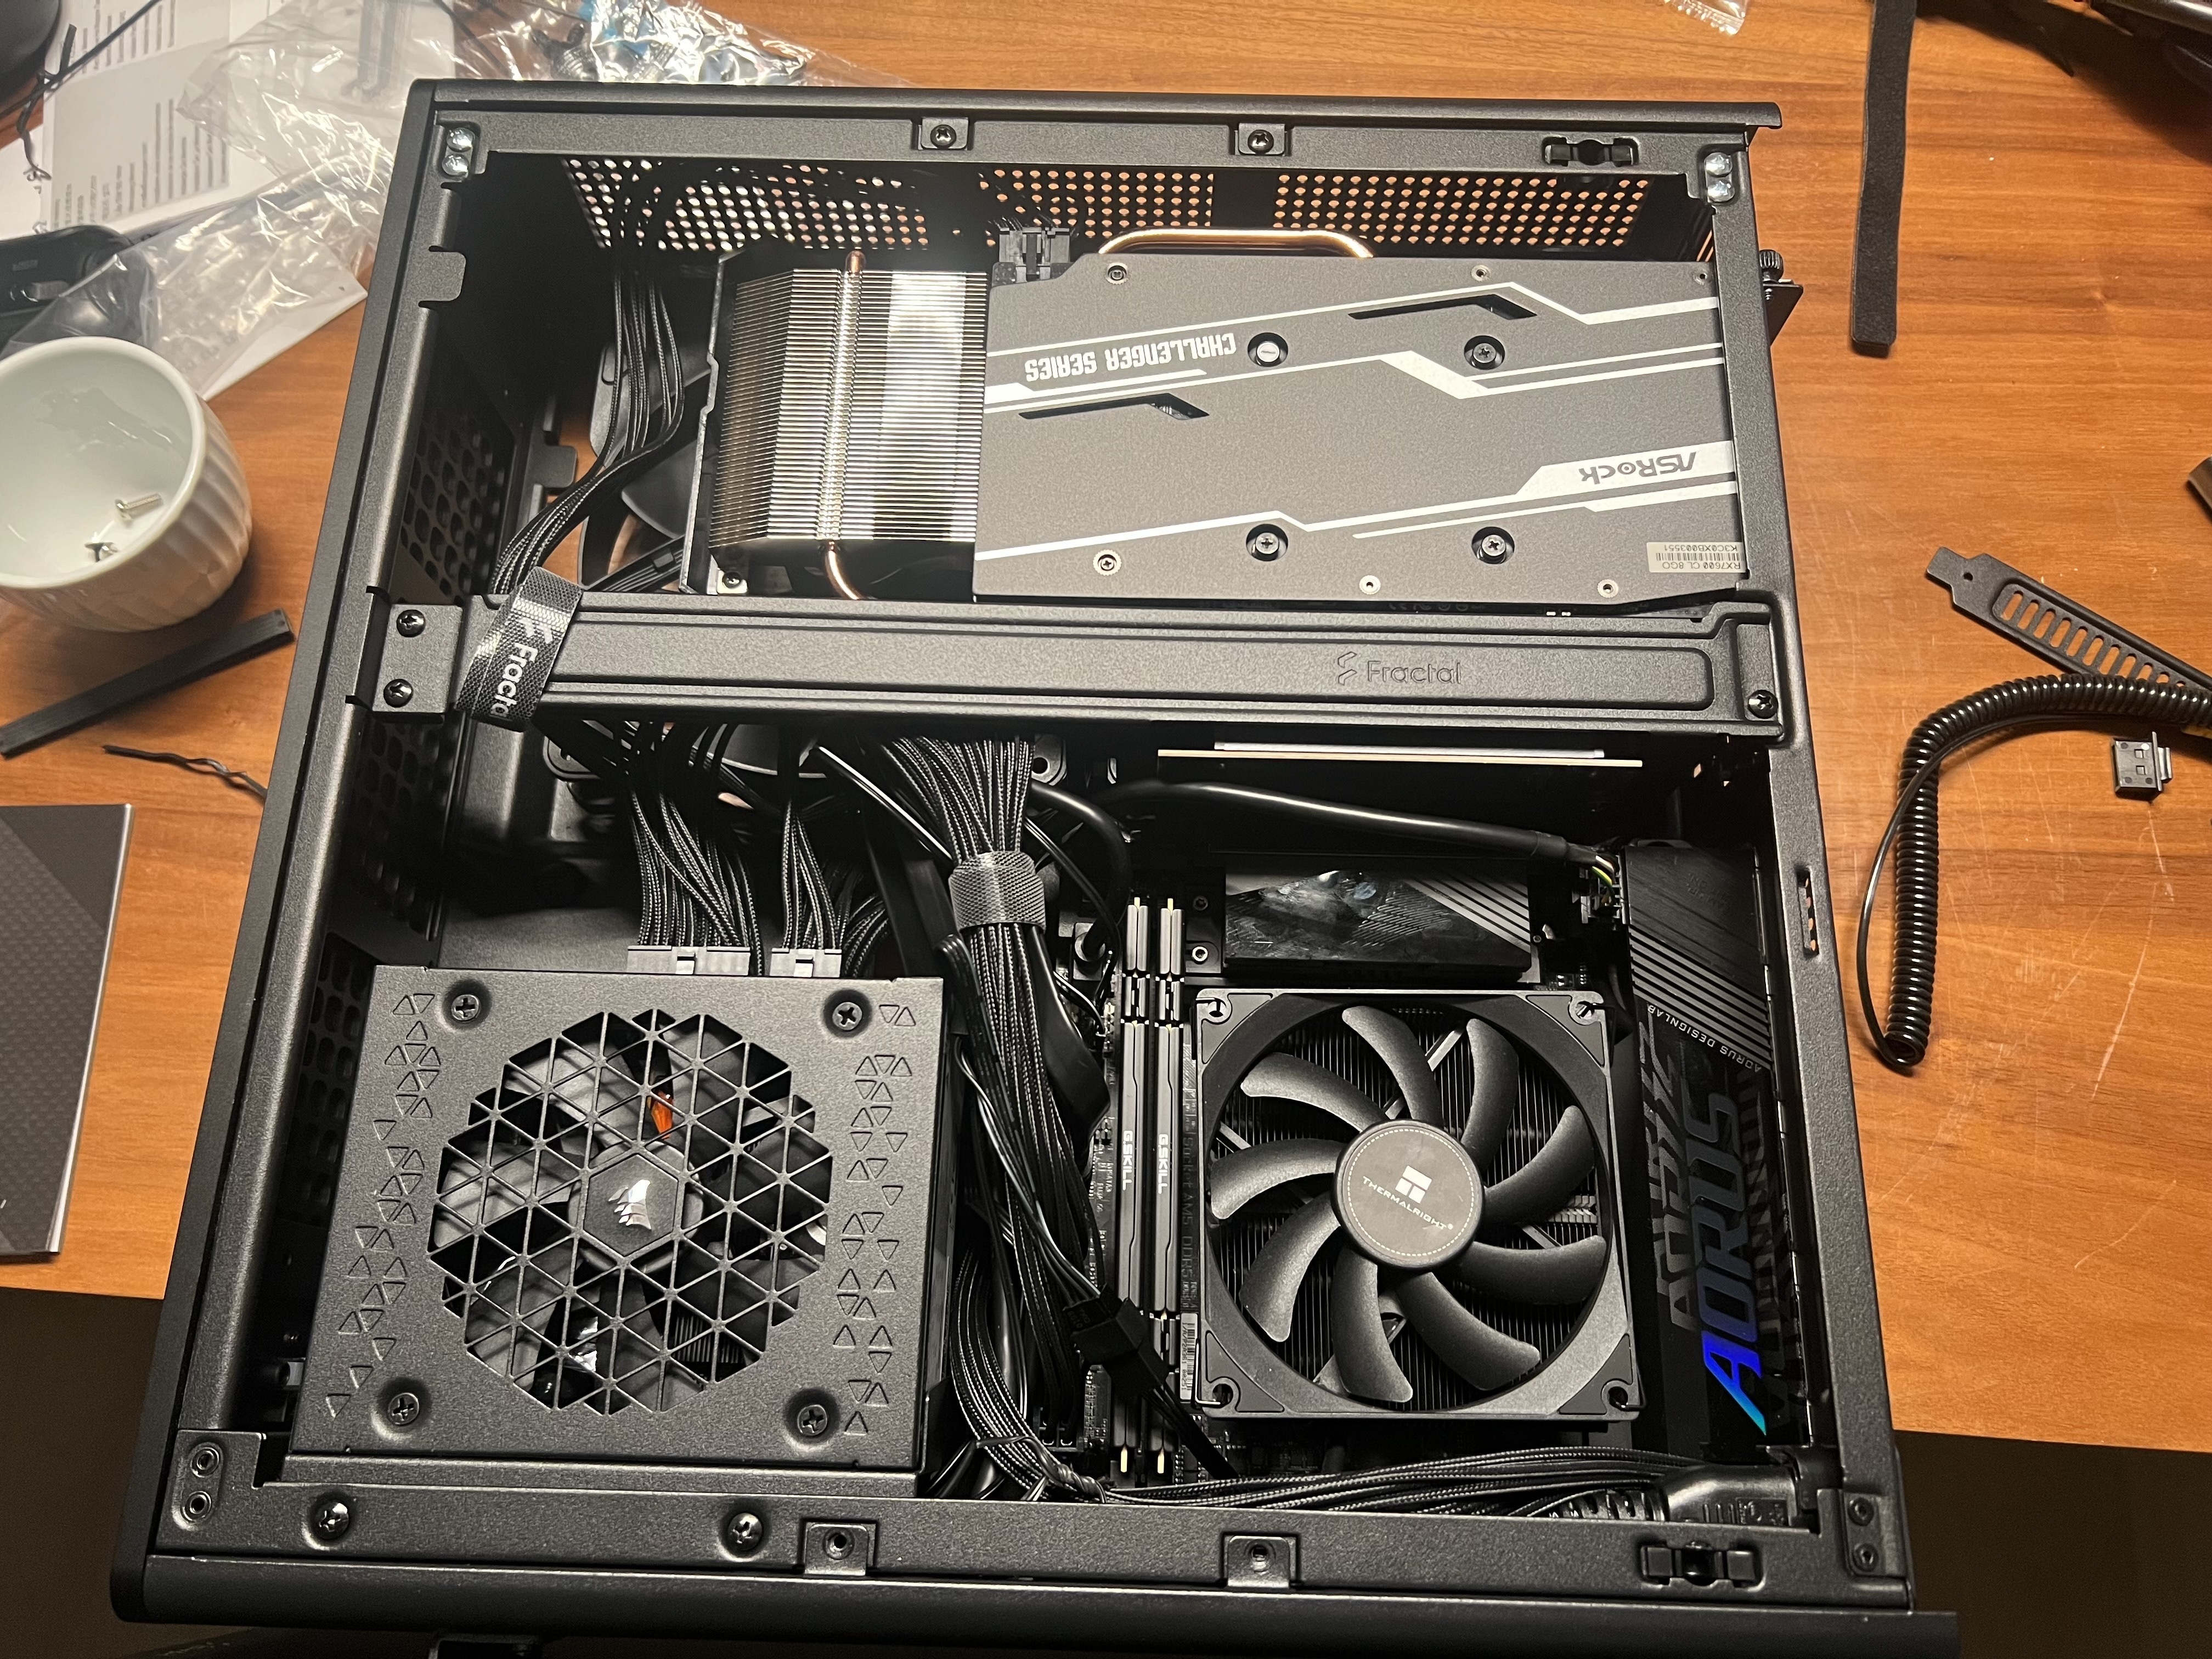
The build lives in a Fractal Design Ridge, a Mini-ITX case purpose-built for living room duty: small footprint, good airflow, and a vertical GPU mount that doesn’t require a riser cable gymnastics routine.
| Component | Model | Price |
|---|---|---|
| Case | Fractal Design Ridge (Black) | $154.99 |
| Motherboard | Gigabyte B850I Aorus Pro (Mini-ITX) | $269.99 |
| CPU | AMD Ryzen 5 7600 (Wraith Stealth) | $159.99 |
| CPU Cooler | Thermalright AXP90 X53 (Low Profile) | $53.99 |
| RAM | G.Skill Flare X5 32GB (2x16GB) DDR5-6000 CL36 | $439.99 |
| GPU | ASRock RX 7600 Challenger 8GB | $279.99 |
| Storage | MSI Spatium M450 1TB NVMe Gen4 | $179.99 |
| PSU | Corsair SF850 80+ Platinum SFX | $179.99 |
| Case Fans | 2x Fractal Aspect 14 PWM (daisy chained) | - |
| Thermal Paste | Bitspower Baircool TP-12.5G | $9.99 |
| OS | SteamOS 3.8 | Free |
Total (parts only): ~$1,858.88 + tax
The Build
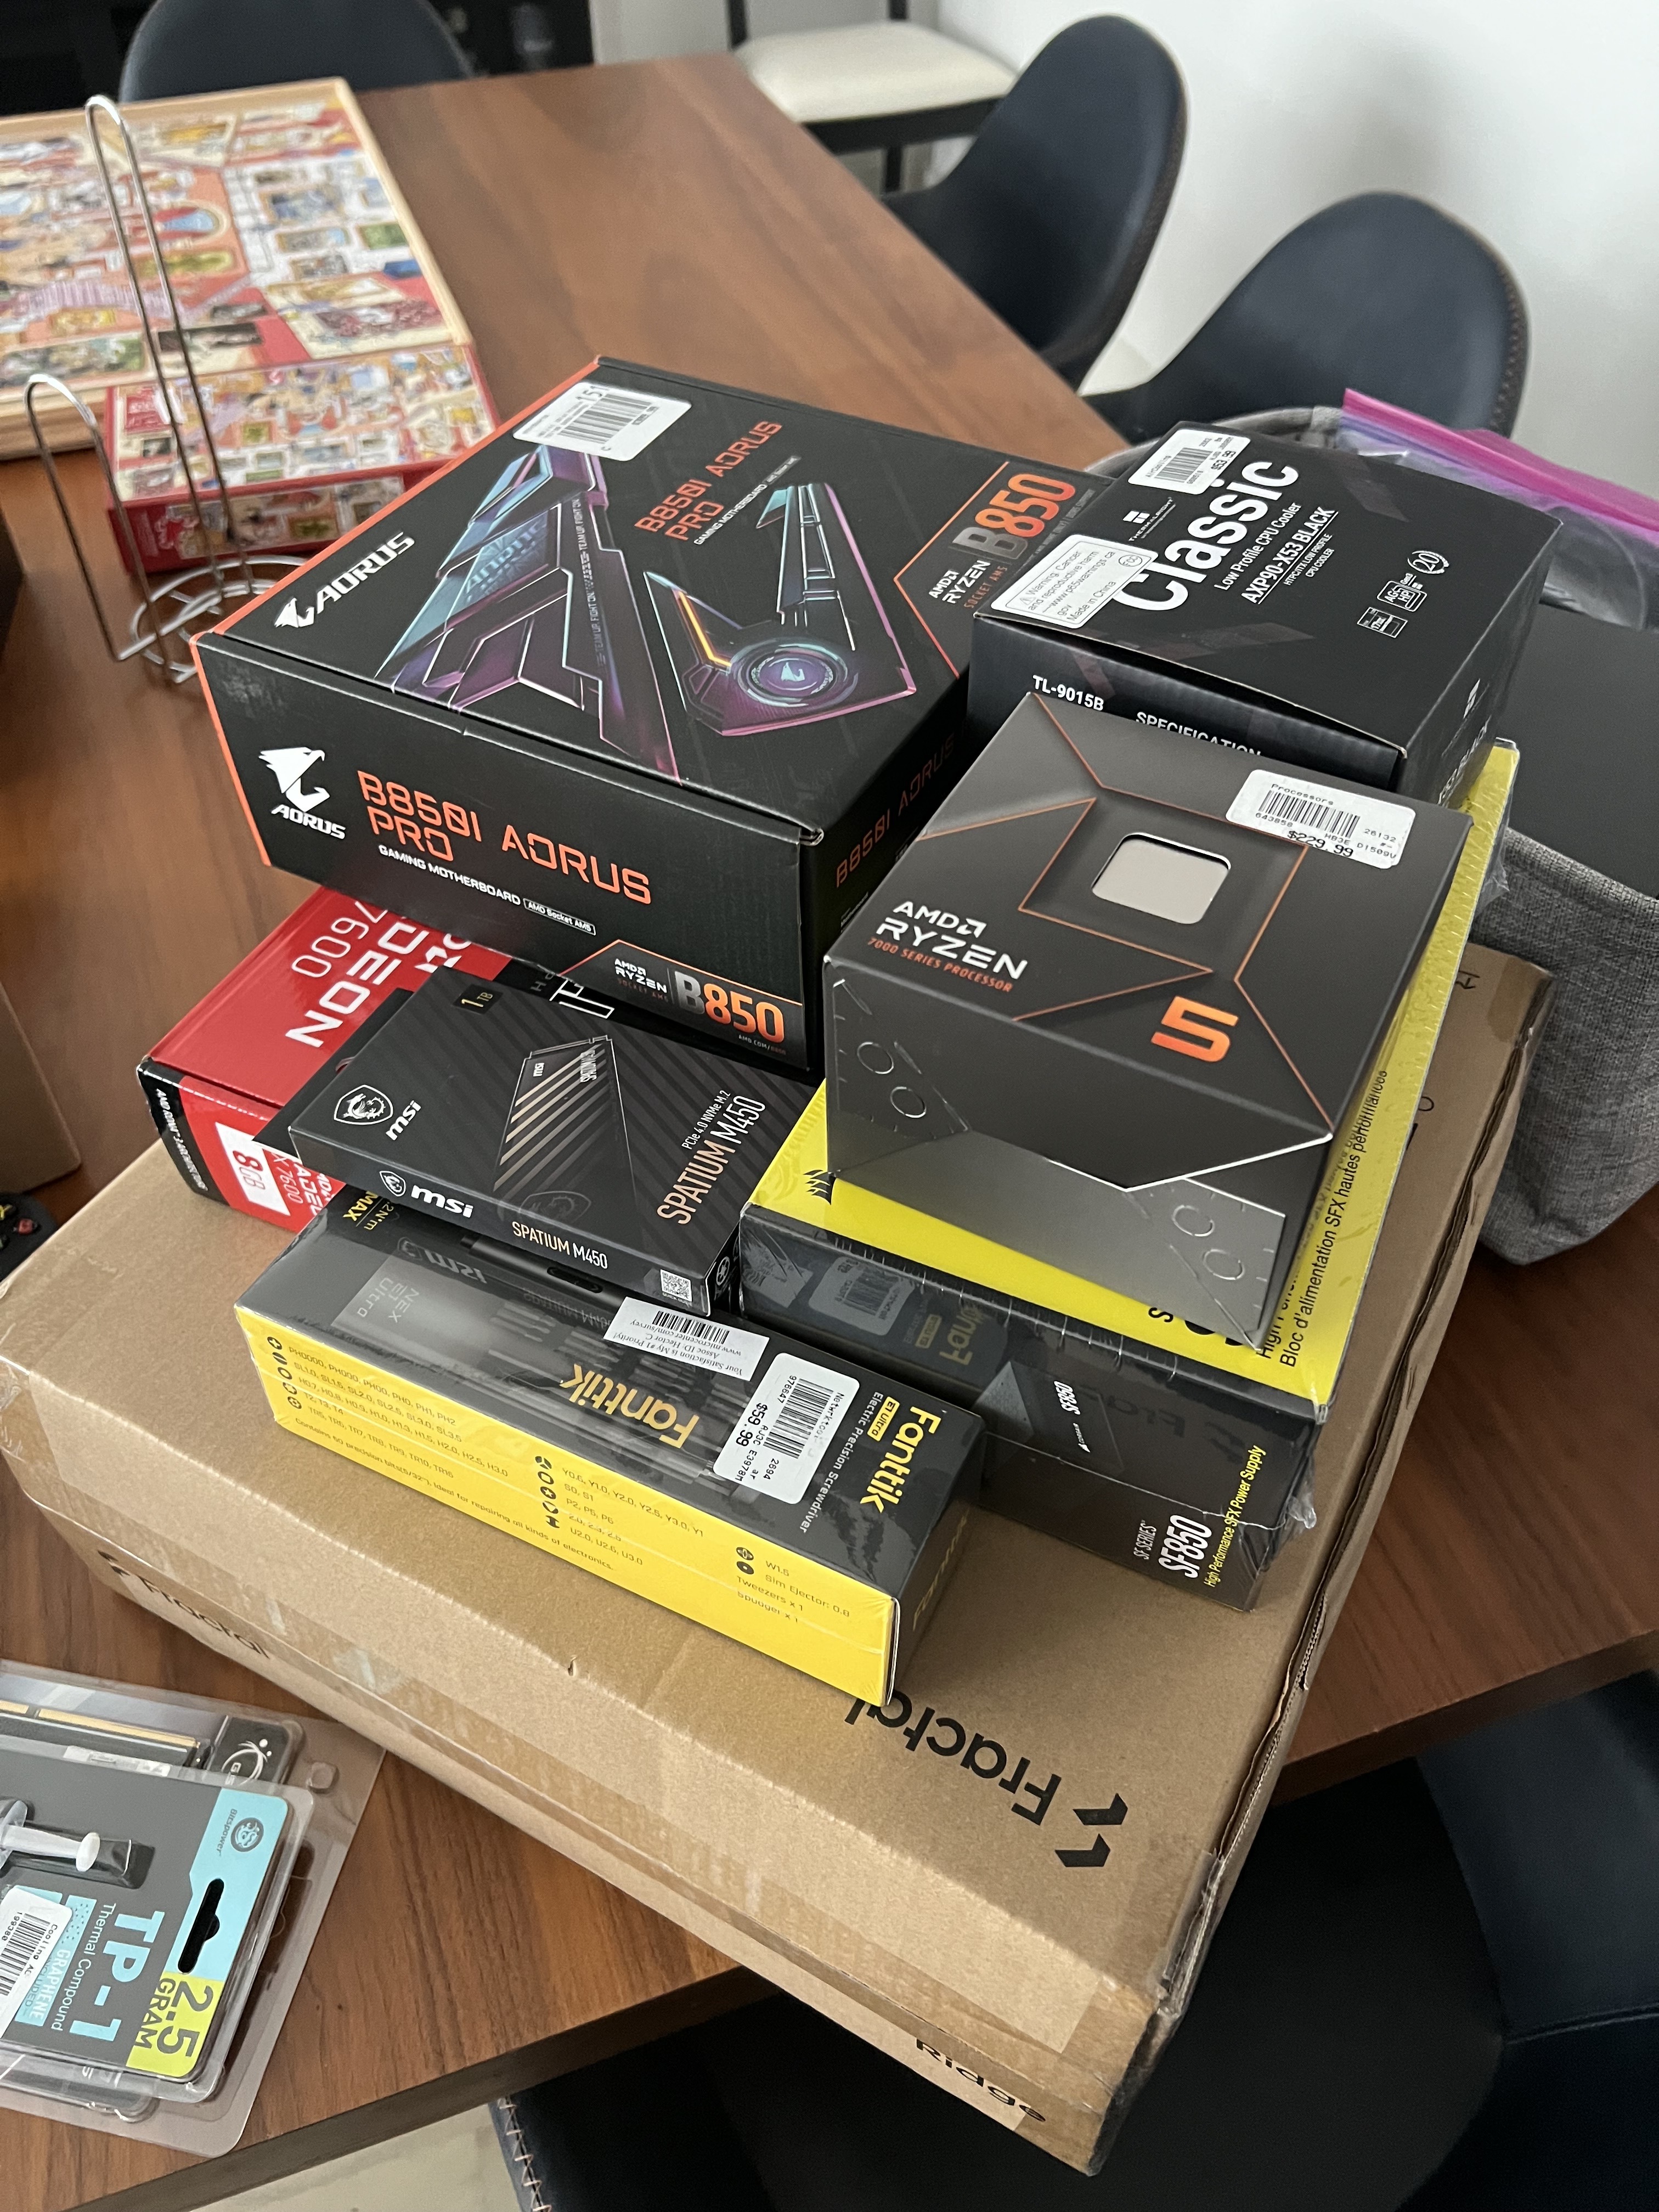
Everything boxed up and ready to go. With a case this small, the build order matters more than usual. The CPU, cooler, and RAM go in on the motherboard before it’s anywhere near the Ridge’s chassis.

The Ryzen 5 7600 seated and ready for its cooler. I went with the Thermalright AXP90 X53, a low-profile cooler, specifically for clearance inside the Ridge. There isn’t much room to spare in a case this size.
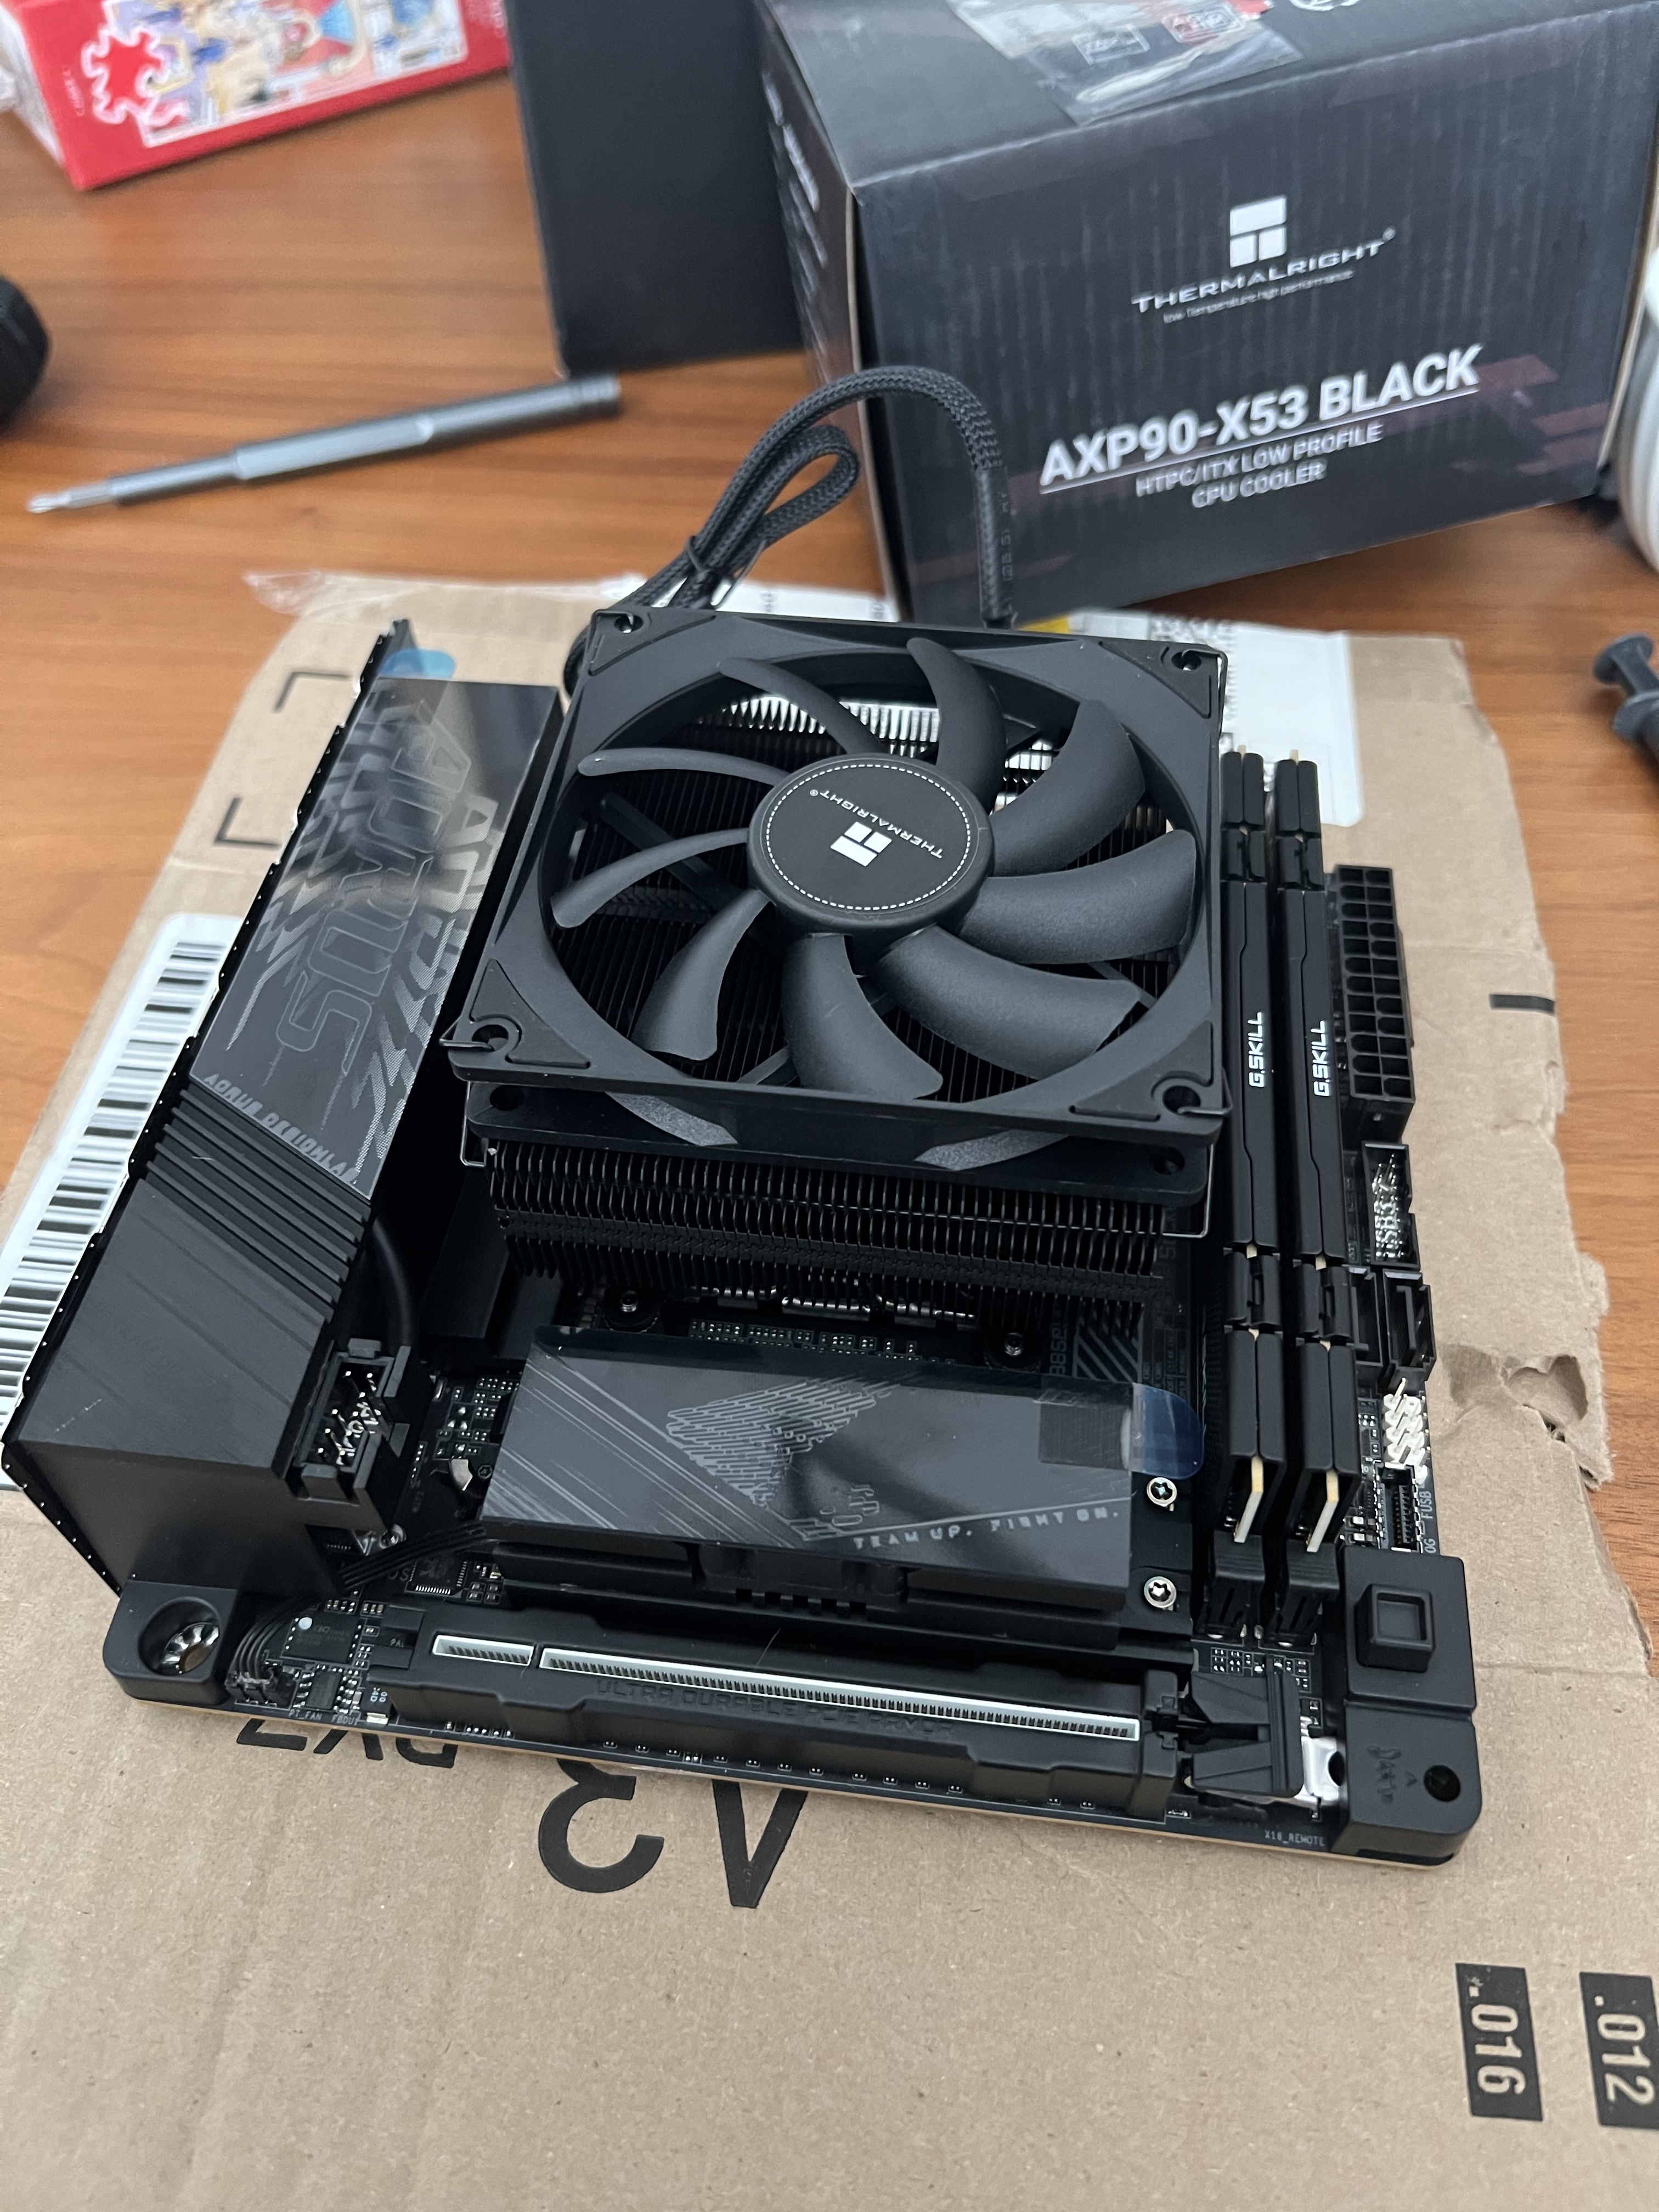
Motherboard fully assembled outside the case: CPU, cooler, and RAM installed, with EXPO enabled to get the G.Skill Flare X5 kit running at its rated DDR5-6000 (confirmed at 6003 MT/s). The cooler is mounted to the CPU_FAN header, and the two Fractal Aspect 14 case fans are daisy-chained off SYS_FAN1. The RX 7600 is fully PCIe-powered and supported by the Ridge’s vertical mount, so there’s no separate PCIe power cable routing to fight with.
Before installing SteamOS, I also disabled Secure Boot in the BIOS, which is required for SteamOS to boot on non-Valve hardware.
Installing SteamOS
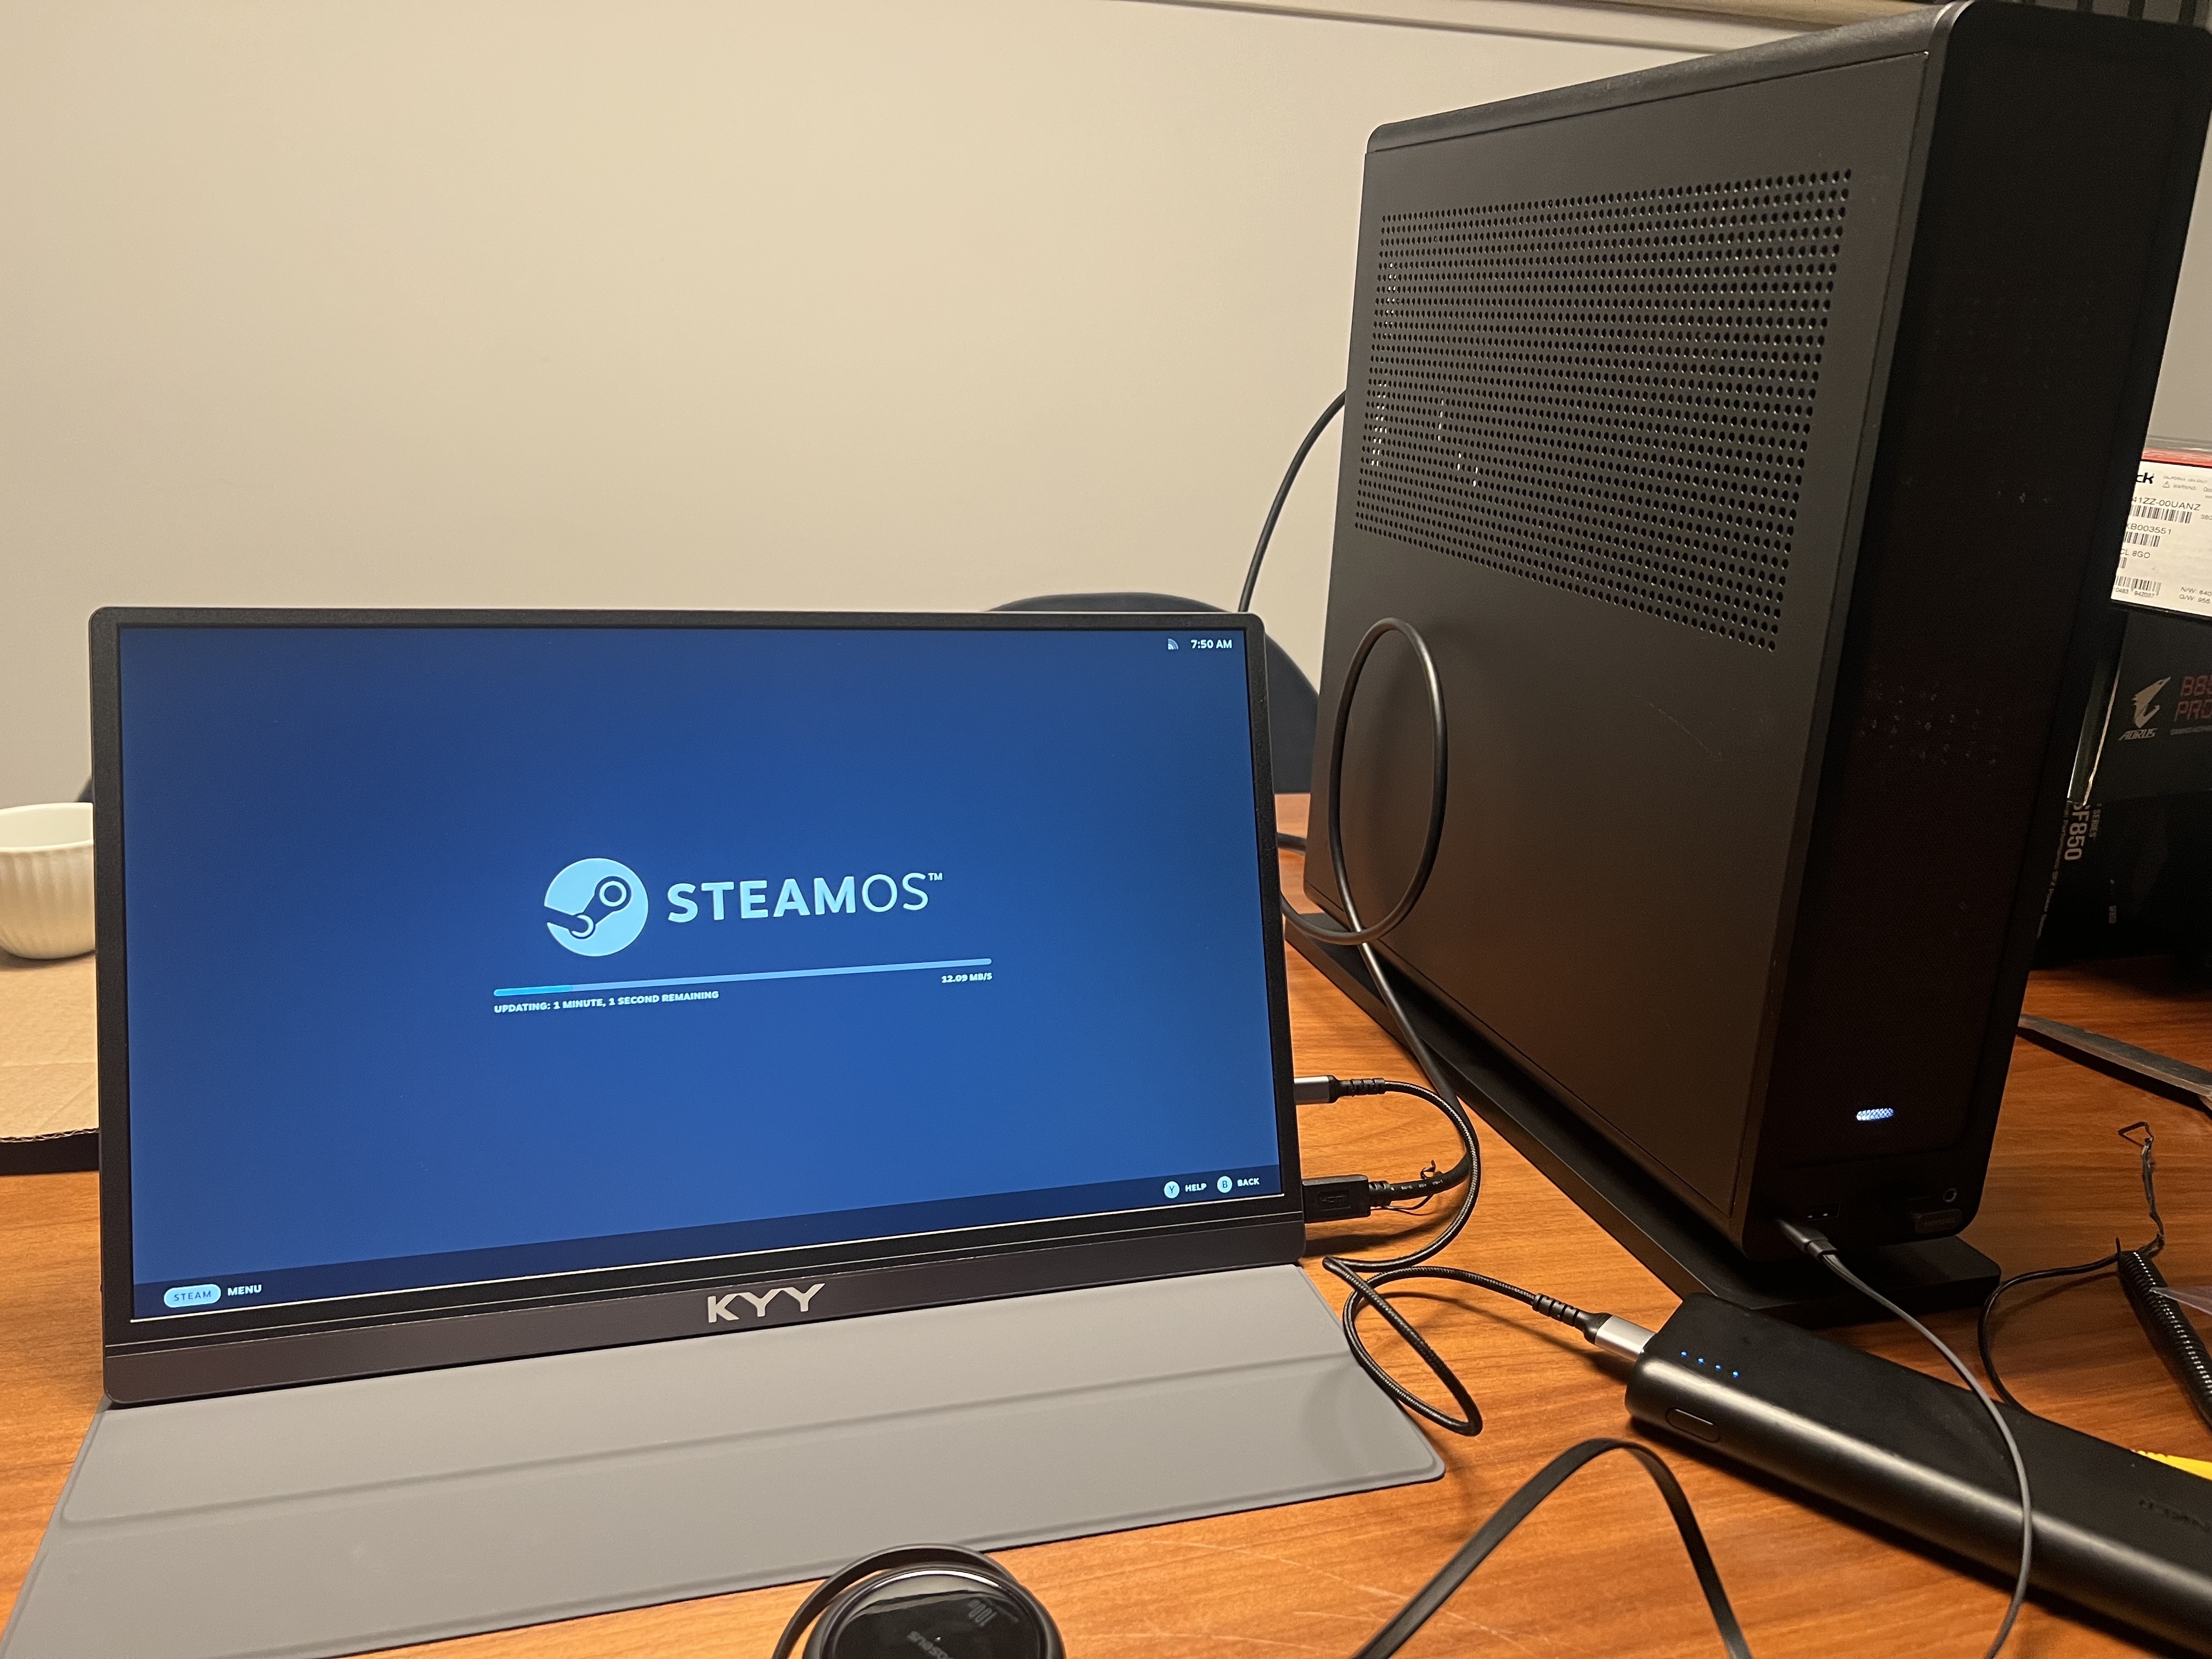
With SteamOS 3.8 now supporting third-party hardware, installation was a straightforward USB image flash and boot, the same Steam Deck-style installer experience, just running on desktop parts instead of Valve’s handheld.
Display Setup
The whole point of this build was a proper couch gaming experience on my LG C1 65" OLED, so getting the display configuration right mattered:
- Connected via HDMI 2, 4K @ 60Hz with HDR enabled
- HDMI Ultra HD Deep Color set to 4K on the TV’s HDMI 2 input (without this, the input silently caps out below 4K/HDR)
- SimpLink (LG’s HDMI-CEC implementation) enabled and paired with SteamOS’s built-in HDMI CEC power settings, so the TV and PC can power on/off together
Performance
The RX 7600 turns out to be a comfortable fit for this use case. It handles native 1080p at high/ultra settings (60-100+ fps) without breaking a sweat, and for 4K it leans on FSR Quality upscaling for most modern titles. On an OLED at typical couch viewing distances, the difference between native and FSR-upscaled 4K is close to negligible, which makes the RX 7600 a much more cost-effective choice than chasing native 4K with a flagship GPU.
Tools Installed
- SSH: remote management via key-based auth
- Steam Link: wireless play from both my Steam Deck and Mac, tapping into this PC’s hardware remotely
- Prometheus + Grafana: a hardware monitoring stack, self-hosted on a separate homelab server, for keeping an eye on temps and utilization
Steam Link: Better Than Expected
I knew Steam Link would work. I didn’t expect it to feel local.
Playing games on my Steam Deck or iPad through Steam Link, streaming from this PC over my home network, the latency is essentially imperceptible. After pairing with a PIN once, it just connects every time. No fussing, no reconnect failures. The PC is proving its value even when I’m not on the sofa; I can be in bed, streaming a full gaming session from the same machine sitting behind the TV in the other room.
The bonus I didn’t fully appreciate until I started using it: my Steam Deck’s battery lasts significantly longer on Steam Link. When the Deck is just streaming rather than running the game itself, its hardware is barely taxed. The heavy lifting happens on the PC. That turns the Steam Deck into a genuinely comfortable extended-session handheld in a way it isn’t when it’s doing all the work on its own.
Hardware Monitoring with Prometheus and Grafana
A machine this capable deserves proper telemetry. I run a self-hosted Prometheus + Grafana monitoring stack on a separate homelab server, and I extended it to cover this PC as well.
The stack works like this:
- Prometheus (port 9090) scrapes metrics every 15 seconds from Node Exporter instances across my homelab
- Grafana (port 3000) visualizes everything, backed by 90 days of time-series retention
- Both services run in Docker containers using host networking, so Prometheus can reach local targets without creating new bridge networks
On the SteamOS side, Node Exporter runs as a systemd user service under the deck user rather than as root. This is the key detail for SteamOS specifically: the filesystem is read-only in places, and services that don’t survive updates aren’t worth setting up. Running it as a user service under deck makes it persistent across OS updates. Full setup details and an automated installer script are in the repo.
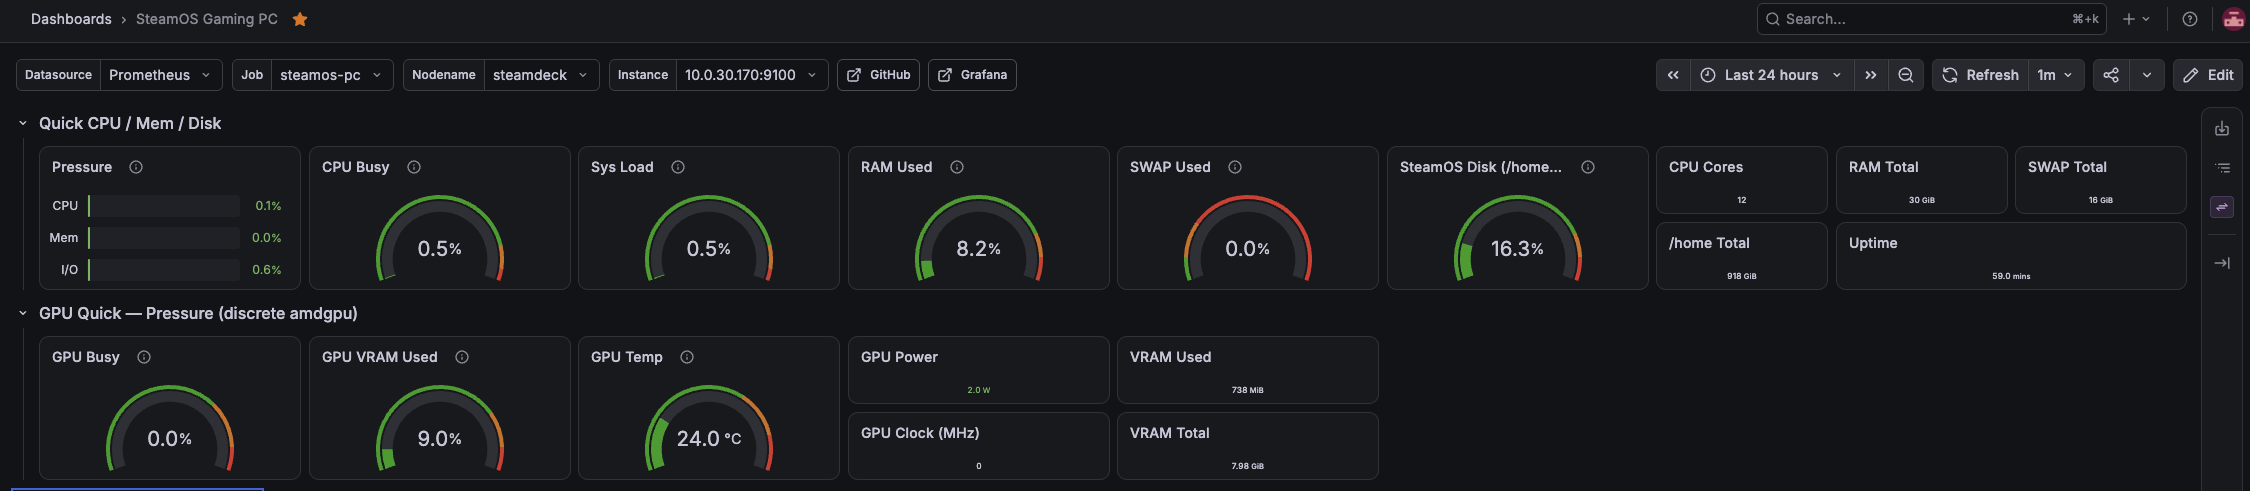
The Node Exporter Full dashboard (Grafana ID 1860) showing live system health: CPU, RAM, temps, and network traffic at a glance.
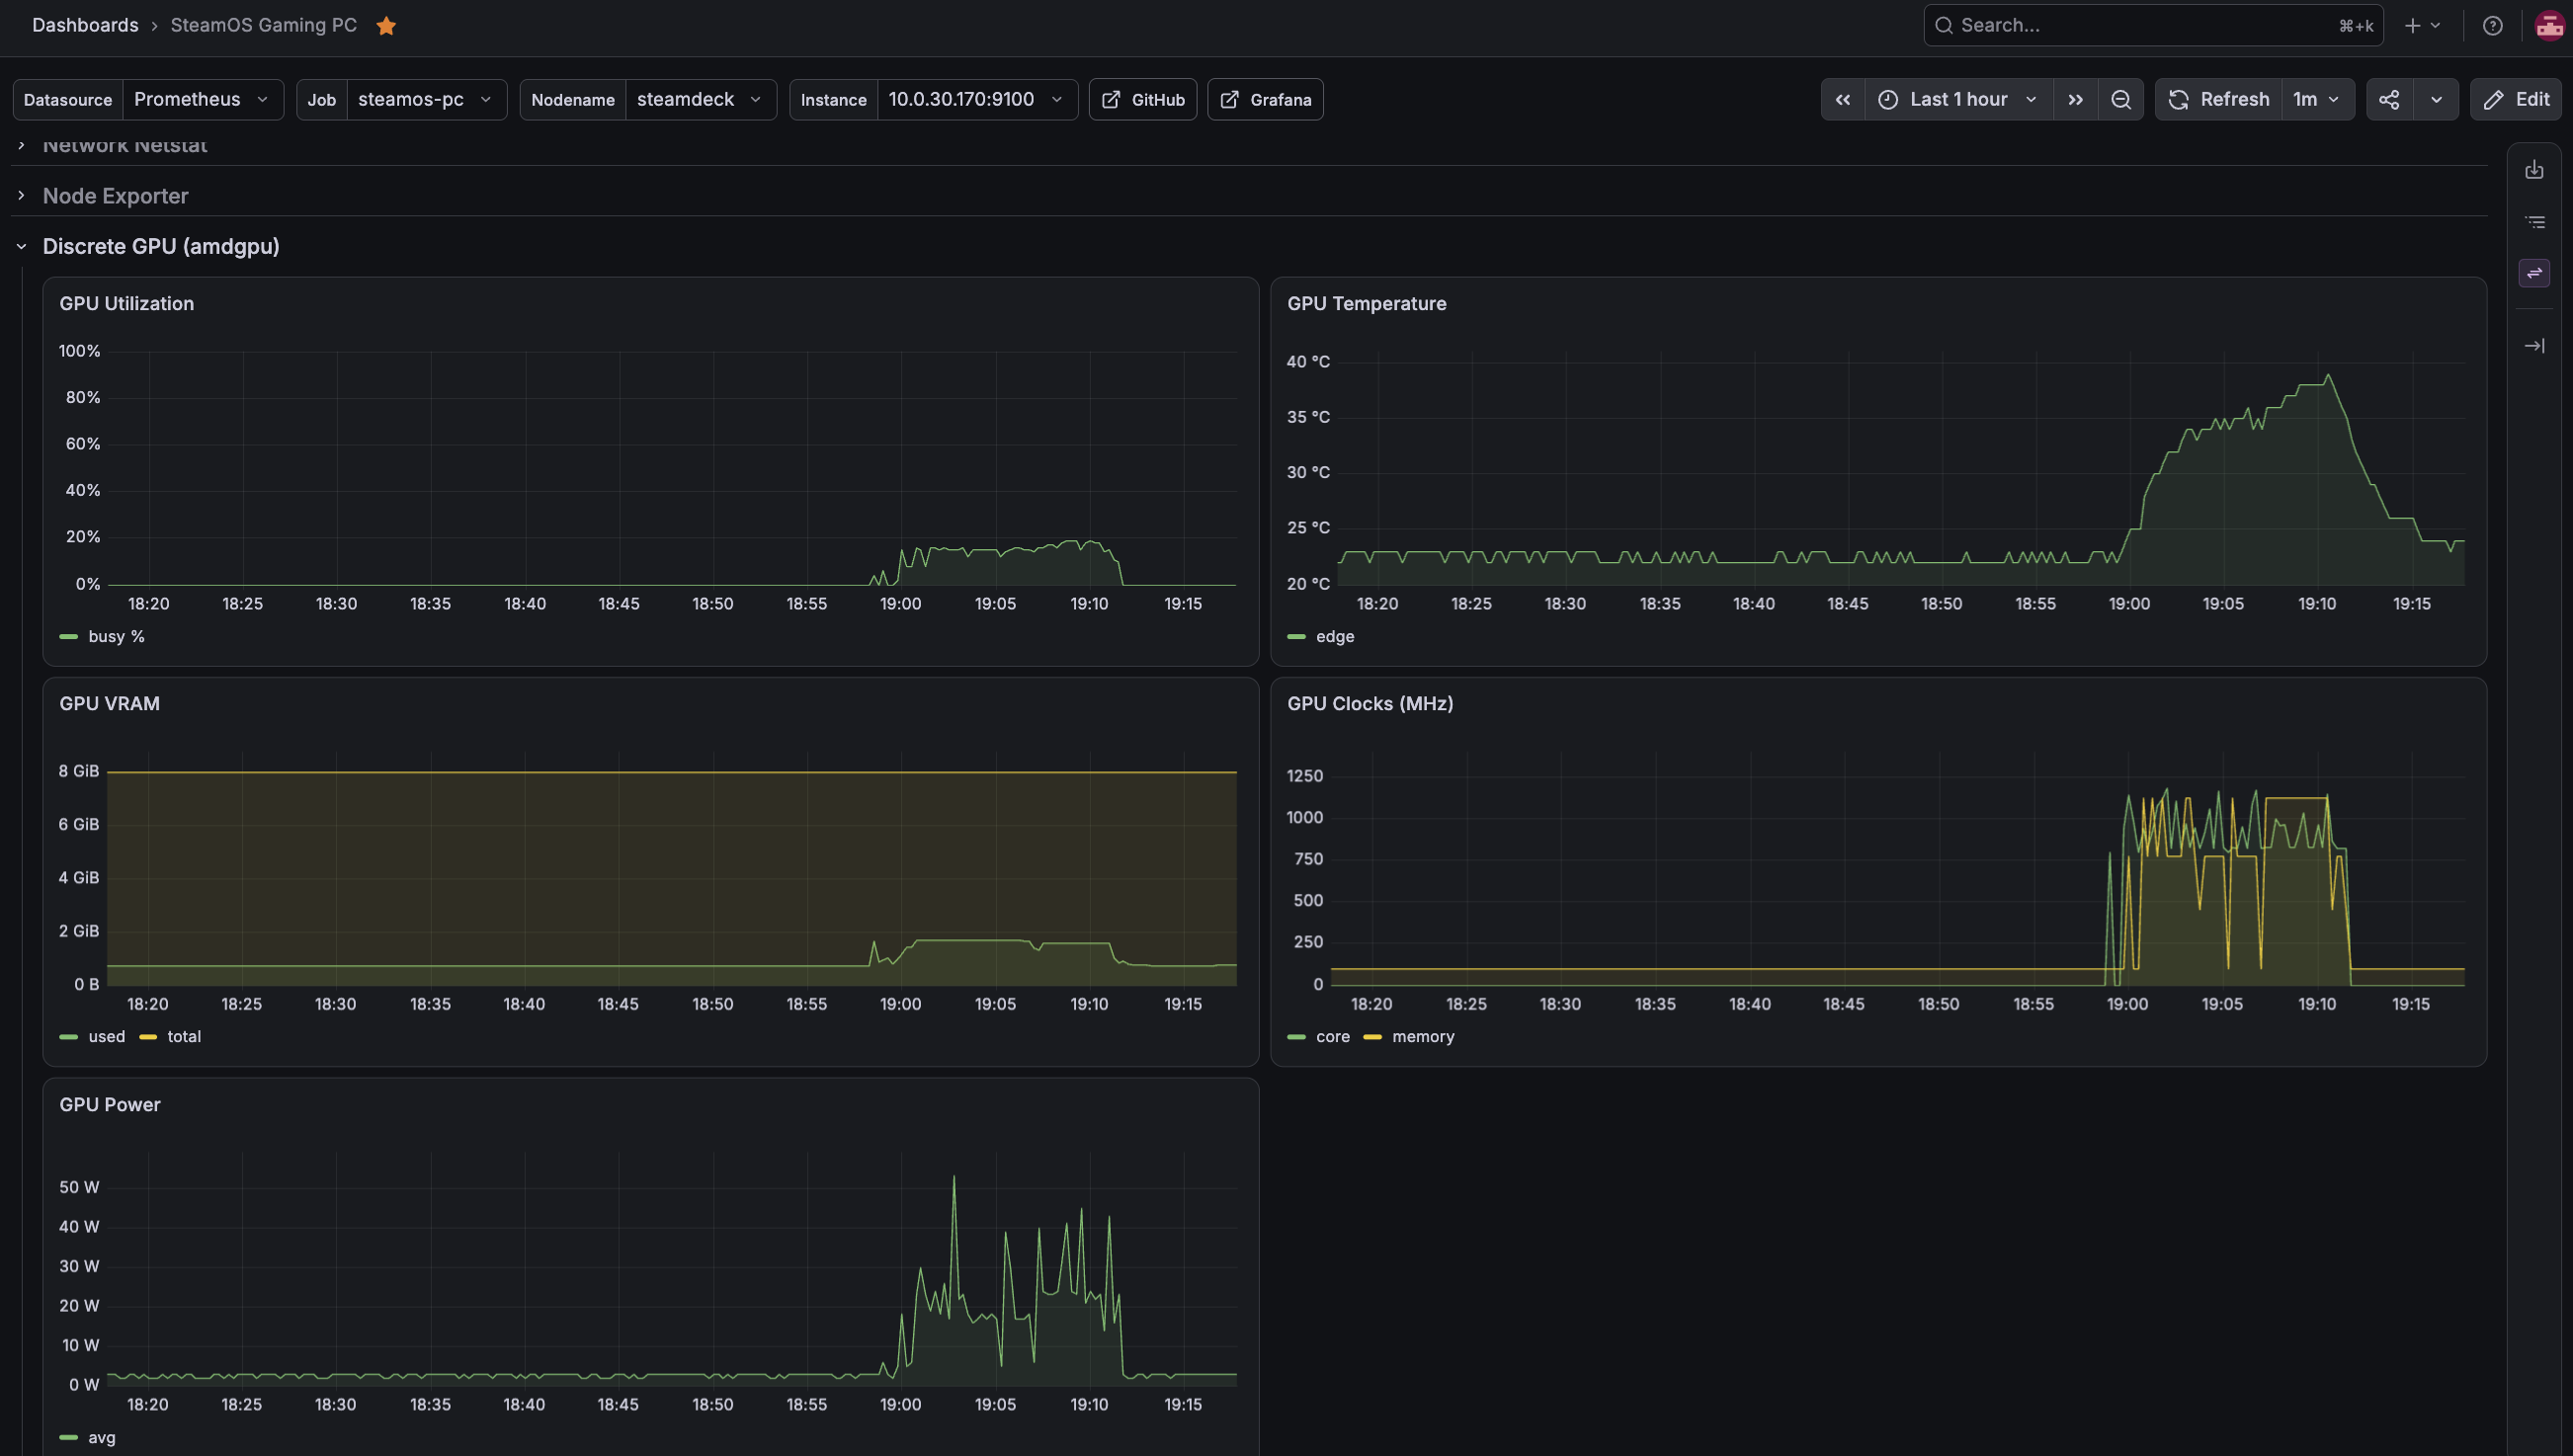
GPU metrics while running Batman: Arkham City, a good baseline for what load looks like on the RX 7600 during an active gaming session.
Lessons Learned
A few things I ran into that are worth knowing if you’re considering a similar build:
- CryoUtilities isn’t a free lunch on desktop hardware. It’s popular in the Steam Deck community, but it’s tuned for the Deck’s 16GB of unified memory. Applying it on a higher-RAM desktop build can introduce swap/memory configurations that cause game launch issues. Proceed with caution if you’re not on Deck hardware.
- Suspend/resume (S3) is unreliable on non-Deck motherboards. SteamOS’s sleep support is clearly built and tested against Valve’s own hardware first. If you run into resume failures, the simplest fix for an always-on couch PC is to just disable sleep entirely (Settings -> Power -> Sleep -> Never).
- HDMI-CEC wake-from-sleep isn’t plug-and-play. Having the PC power on the TV automatically is possible on a DIY SteamOS build, but it requires specific BIOS settings (Deep Sleep disabled, USB/PCIe device power-on enabled) plus community scripts to get working. It’s not something that just works out of the box like it does on a Steam Deck dock.
The Result
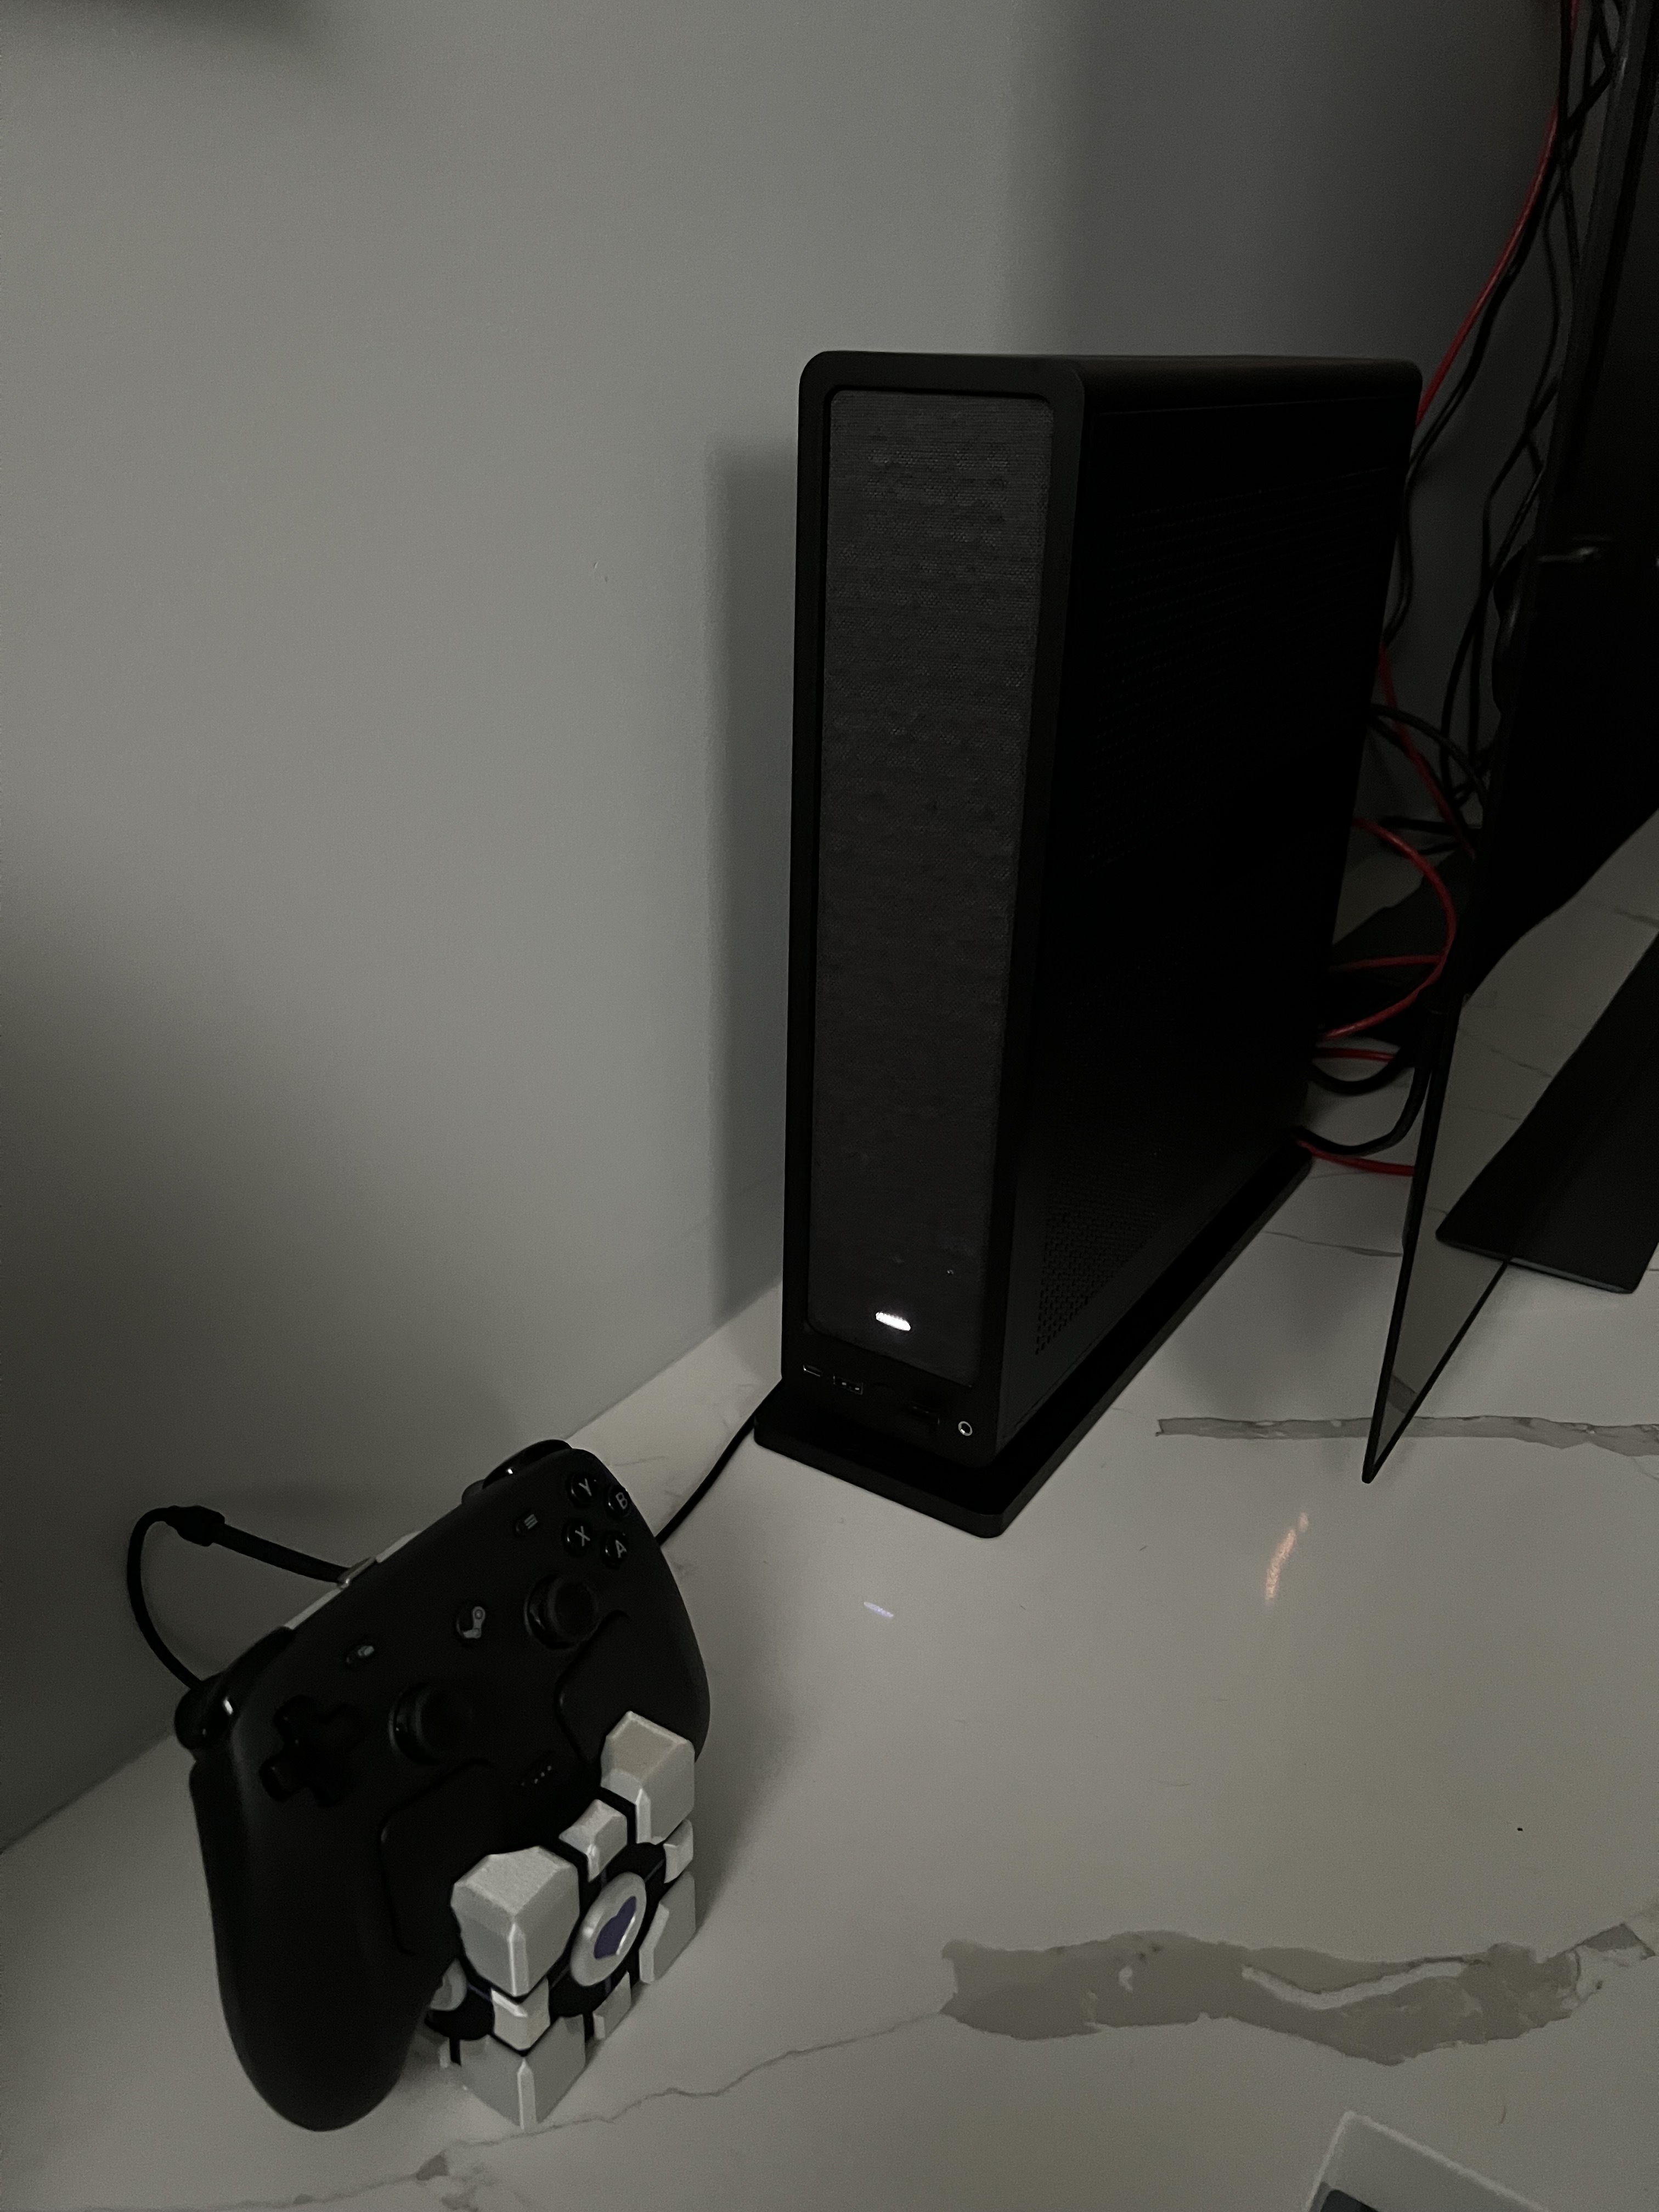
Tucked behind the TV, out of the way and quiet.
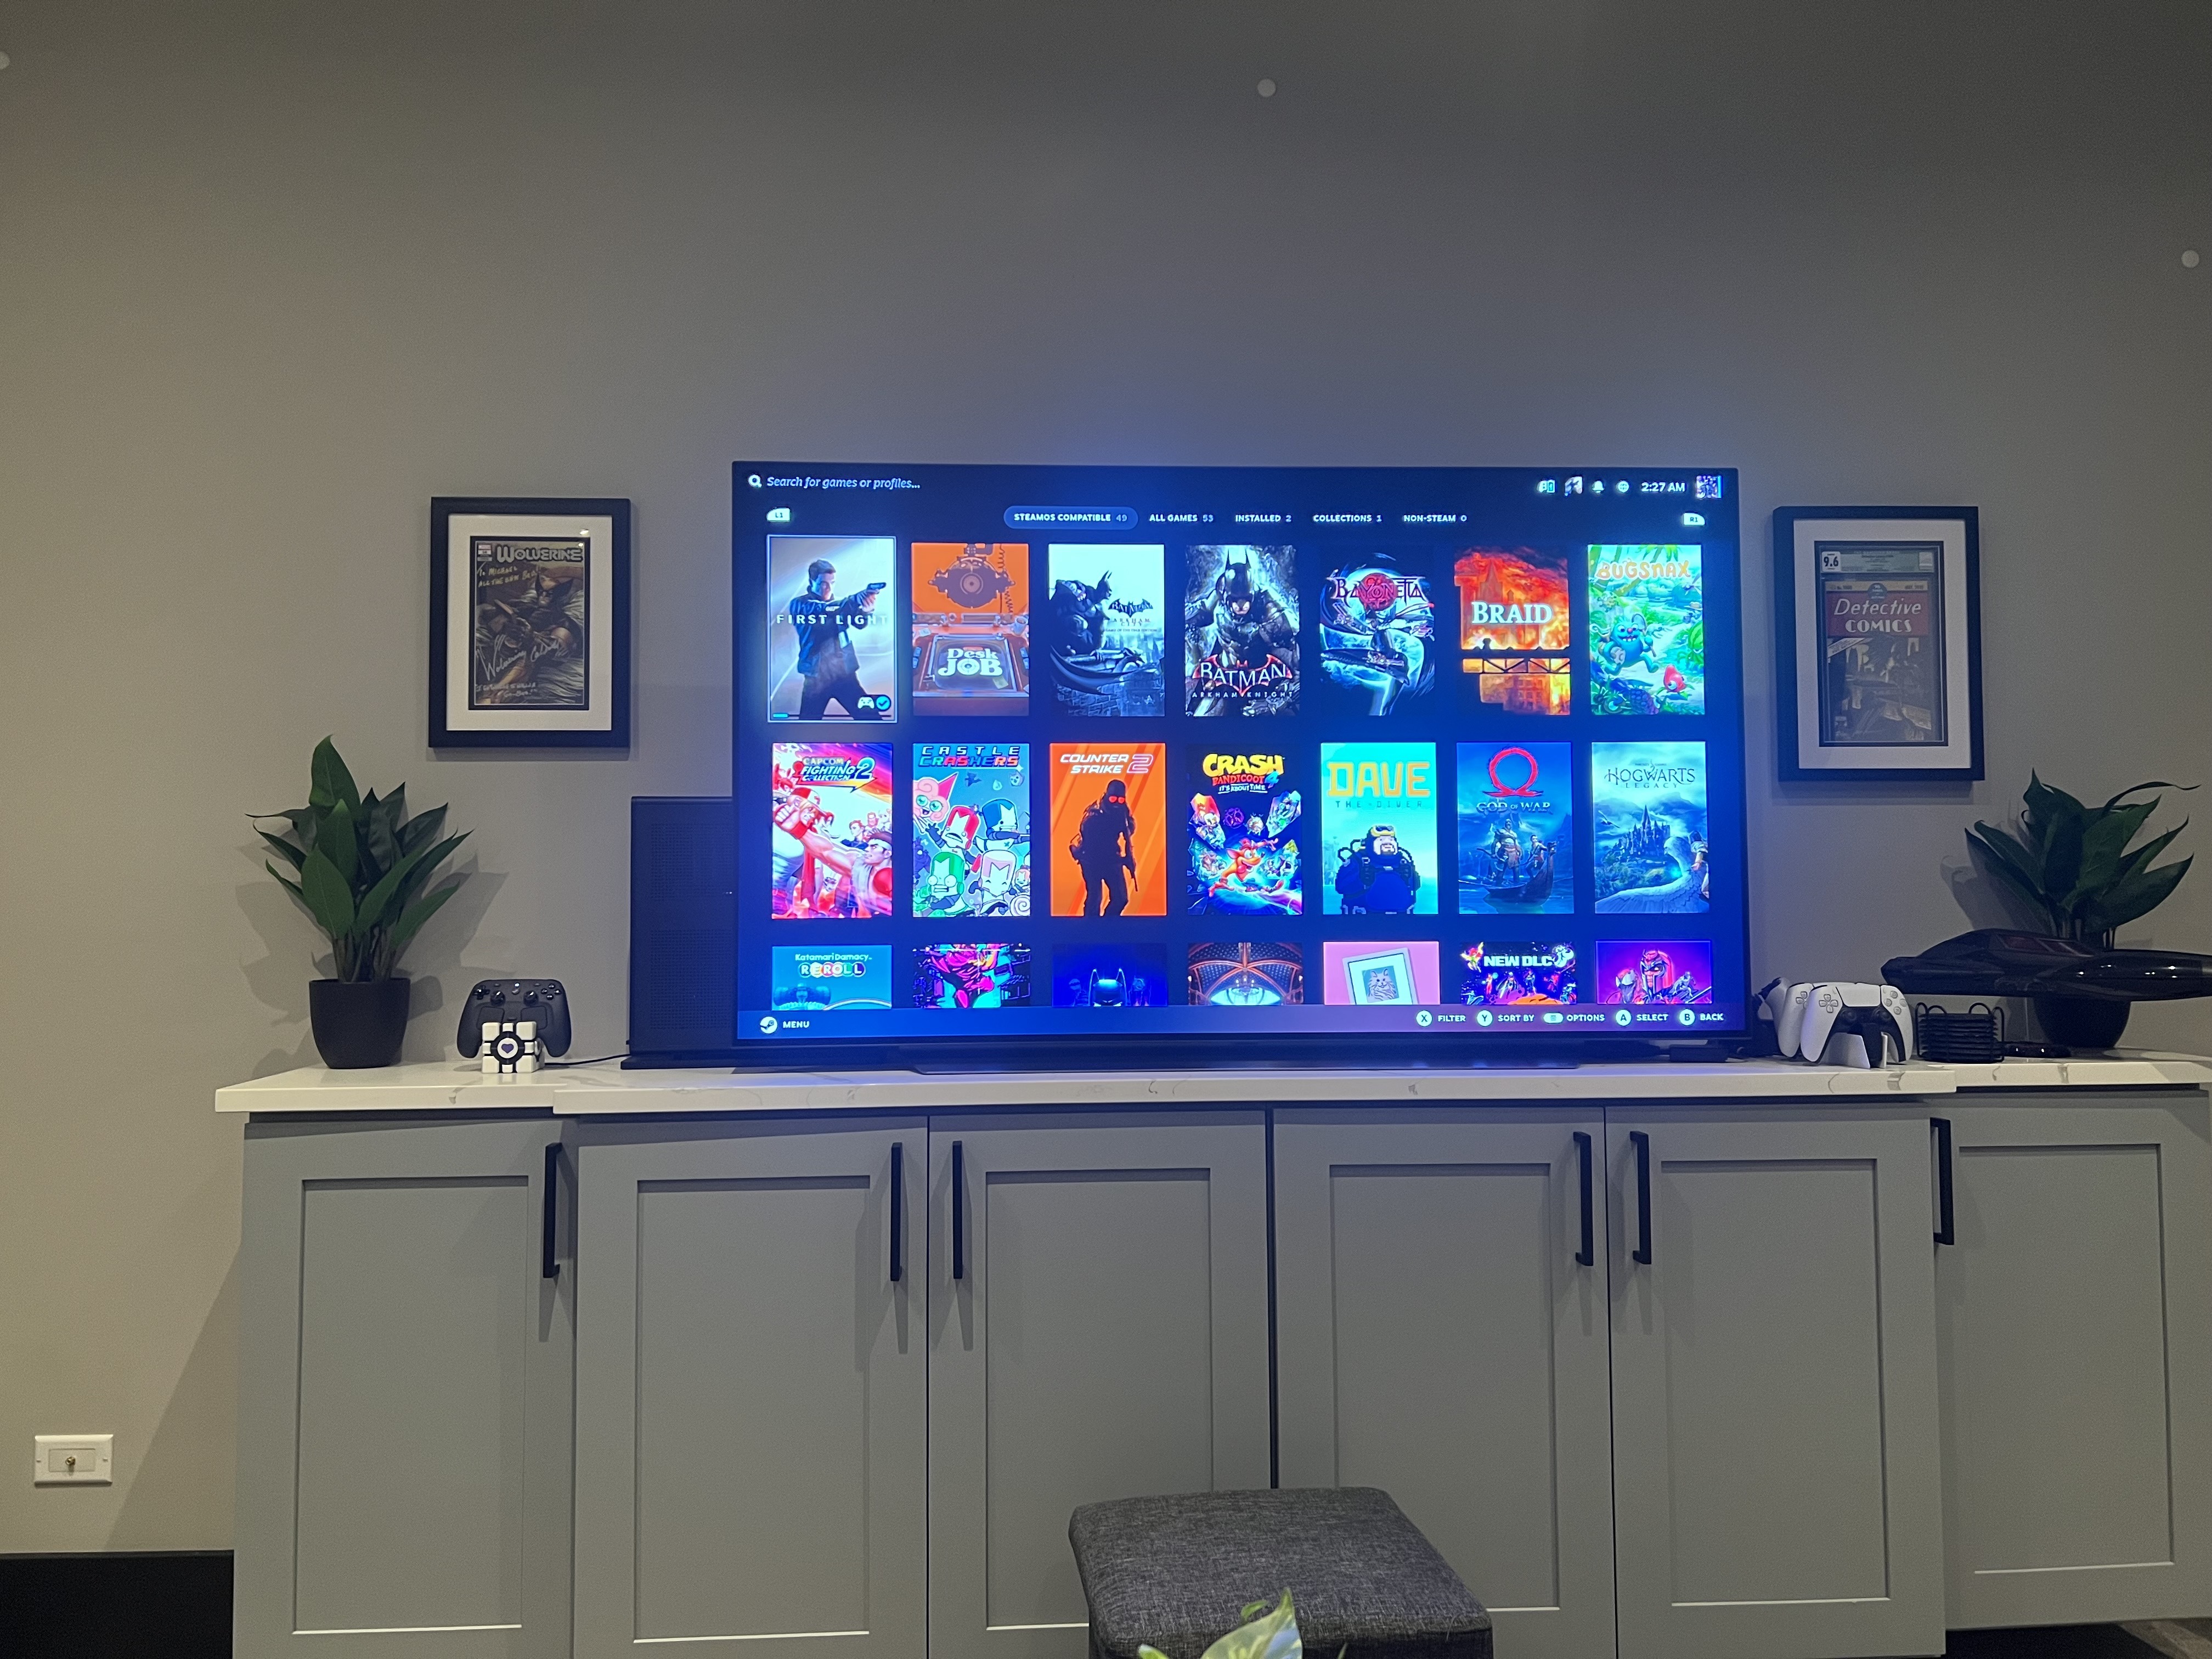
The full SteamOS Big Picture-style experience, now living on the big screen.
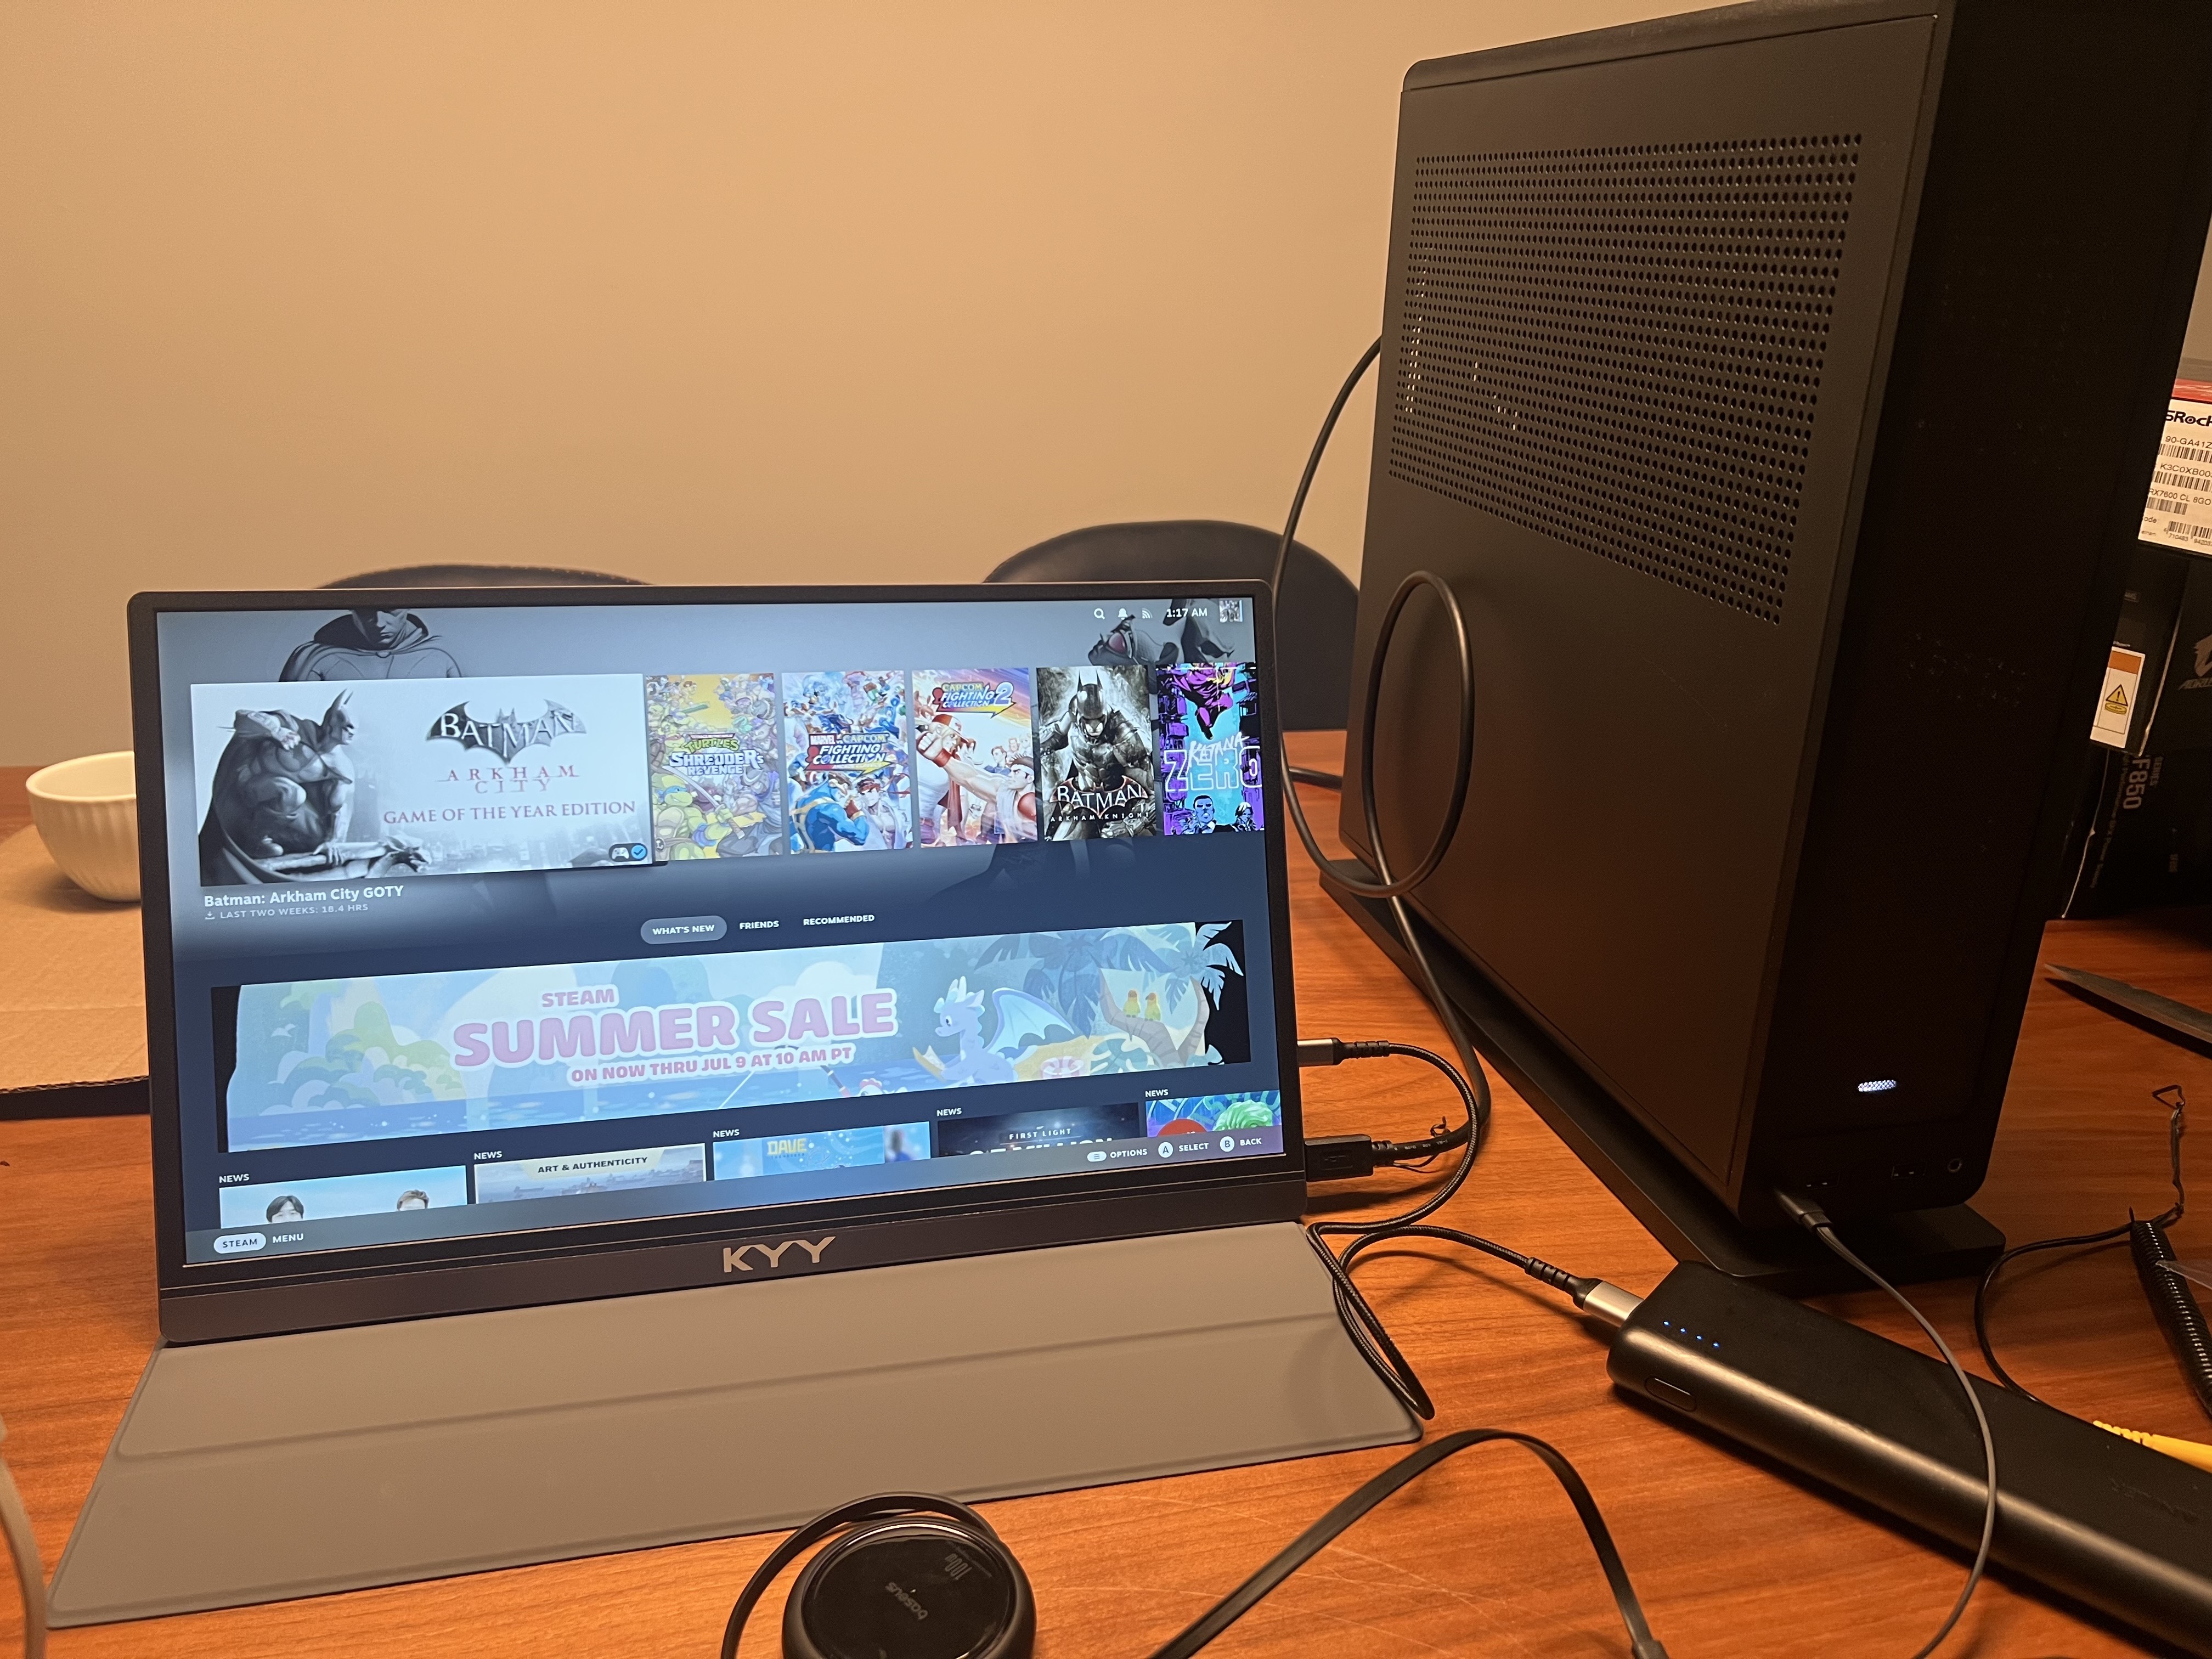
And it’s just as at home on a monitor for those times the TV’s busy with something else.
After years of trusting SteamOS on the Steam Deck, getting that same experience on real desktop hardware, with the ability to upgrade the GPU or RAM down the line instead of waiting on Valve for a sequel, has been exactly the payoff I was hoping for.