Closing out the series
This is the final chapter in what turned into a three-part series on my SteamOS couch gaming PC. The last post ended with a free BIOS fix: Eco Mode plus a 70°C boost target dropped my sustained CPU temps by about 20 degrees. A good outcome, but an honest reading of it is that I taught the CPU to stop trying so hard. The underlying cooling limitation was still there.
What sent me back in for one more round was JayzTwoCents’ cooler swap video. What stuck with me wasn’t the specific hardware, it was watching how methodically he approached a swap: measure first, mind the mounting quirks, and treat cooler orientation as a real decision instead of an afterthought. That last point turned out to be the whole ballgame in a case as tight as the Ridge. So I retired the AXP90 X53 that had been flirting with Tjmax and replaced it with its bigger sibling, the Thermalright AXP120-X67. At 67mm tall it just clears the Ridge’s cooler ceiling, and its 120mm fan moves considerably more air than the 92mm unit it replaced.
If you read the last post closely, you might remember I mentioned another Ridge owner running this exact cooler on a 7600X and still reporting heat and noise complaints, which made me skeptical it would be worth the money. As you’ll see below, my results were far better, and I credit the difference to two things: my non-X 7600 draws less power than their 7600X to begin with, and I put real thought into the mounting orientation instead of just bolting it on.
The orientation trick
The interesting wrinkle with the AXP120-X67: its mount isn’t centered on the heatsink. Depending on how you rotate it, the heat pipes and the fin stack shift toward one side of the socket. I oriented the heat pipes pointing away from the RAM, which leaves the heatsink slightly overhanging the DIMM slots.
That overhang sounds like a clearance problem, but in the Ridge it’s actually a feature. The cooler’s fan now pushes air down over the memory and VRM area on its way through the fins, instead of letting hot air recirculate in the dead zone around the socket. In a sandwich-style case with a ~70mm cooler ceiling and no room for extra fans, getting the airflow you already have to do double duty is about the only optimization left.
Results
The numbers made the BIOS fix look like the warm-up act. With the AXP120-X67 installed, I removed nothing and capped nothing: no Eco Mode required, no boost target, stock power behavior. Sustained temps dropped roughly 25°C from where the old cooler had them, and even the worst momentary spike of the night topped out at 80.6°C, a temperature the AXP90 blew past at less than half the load.
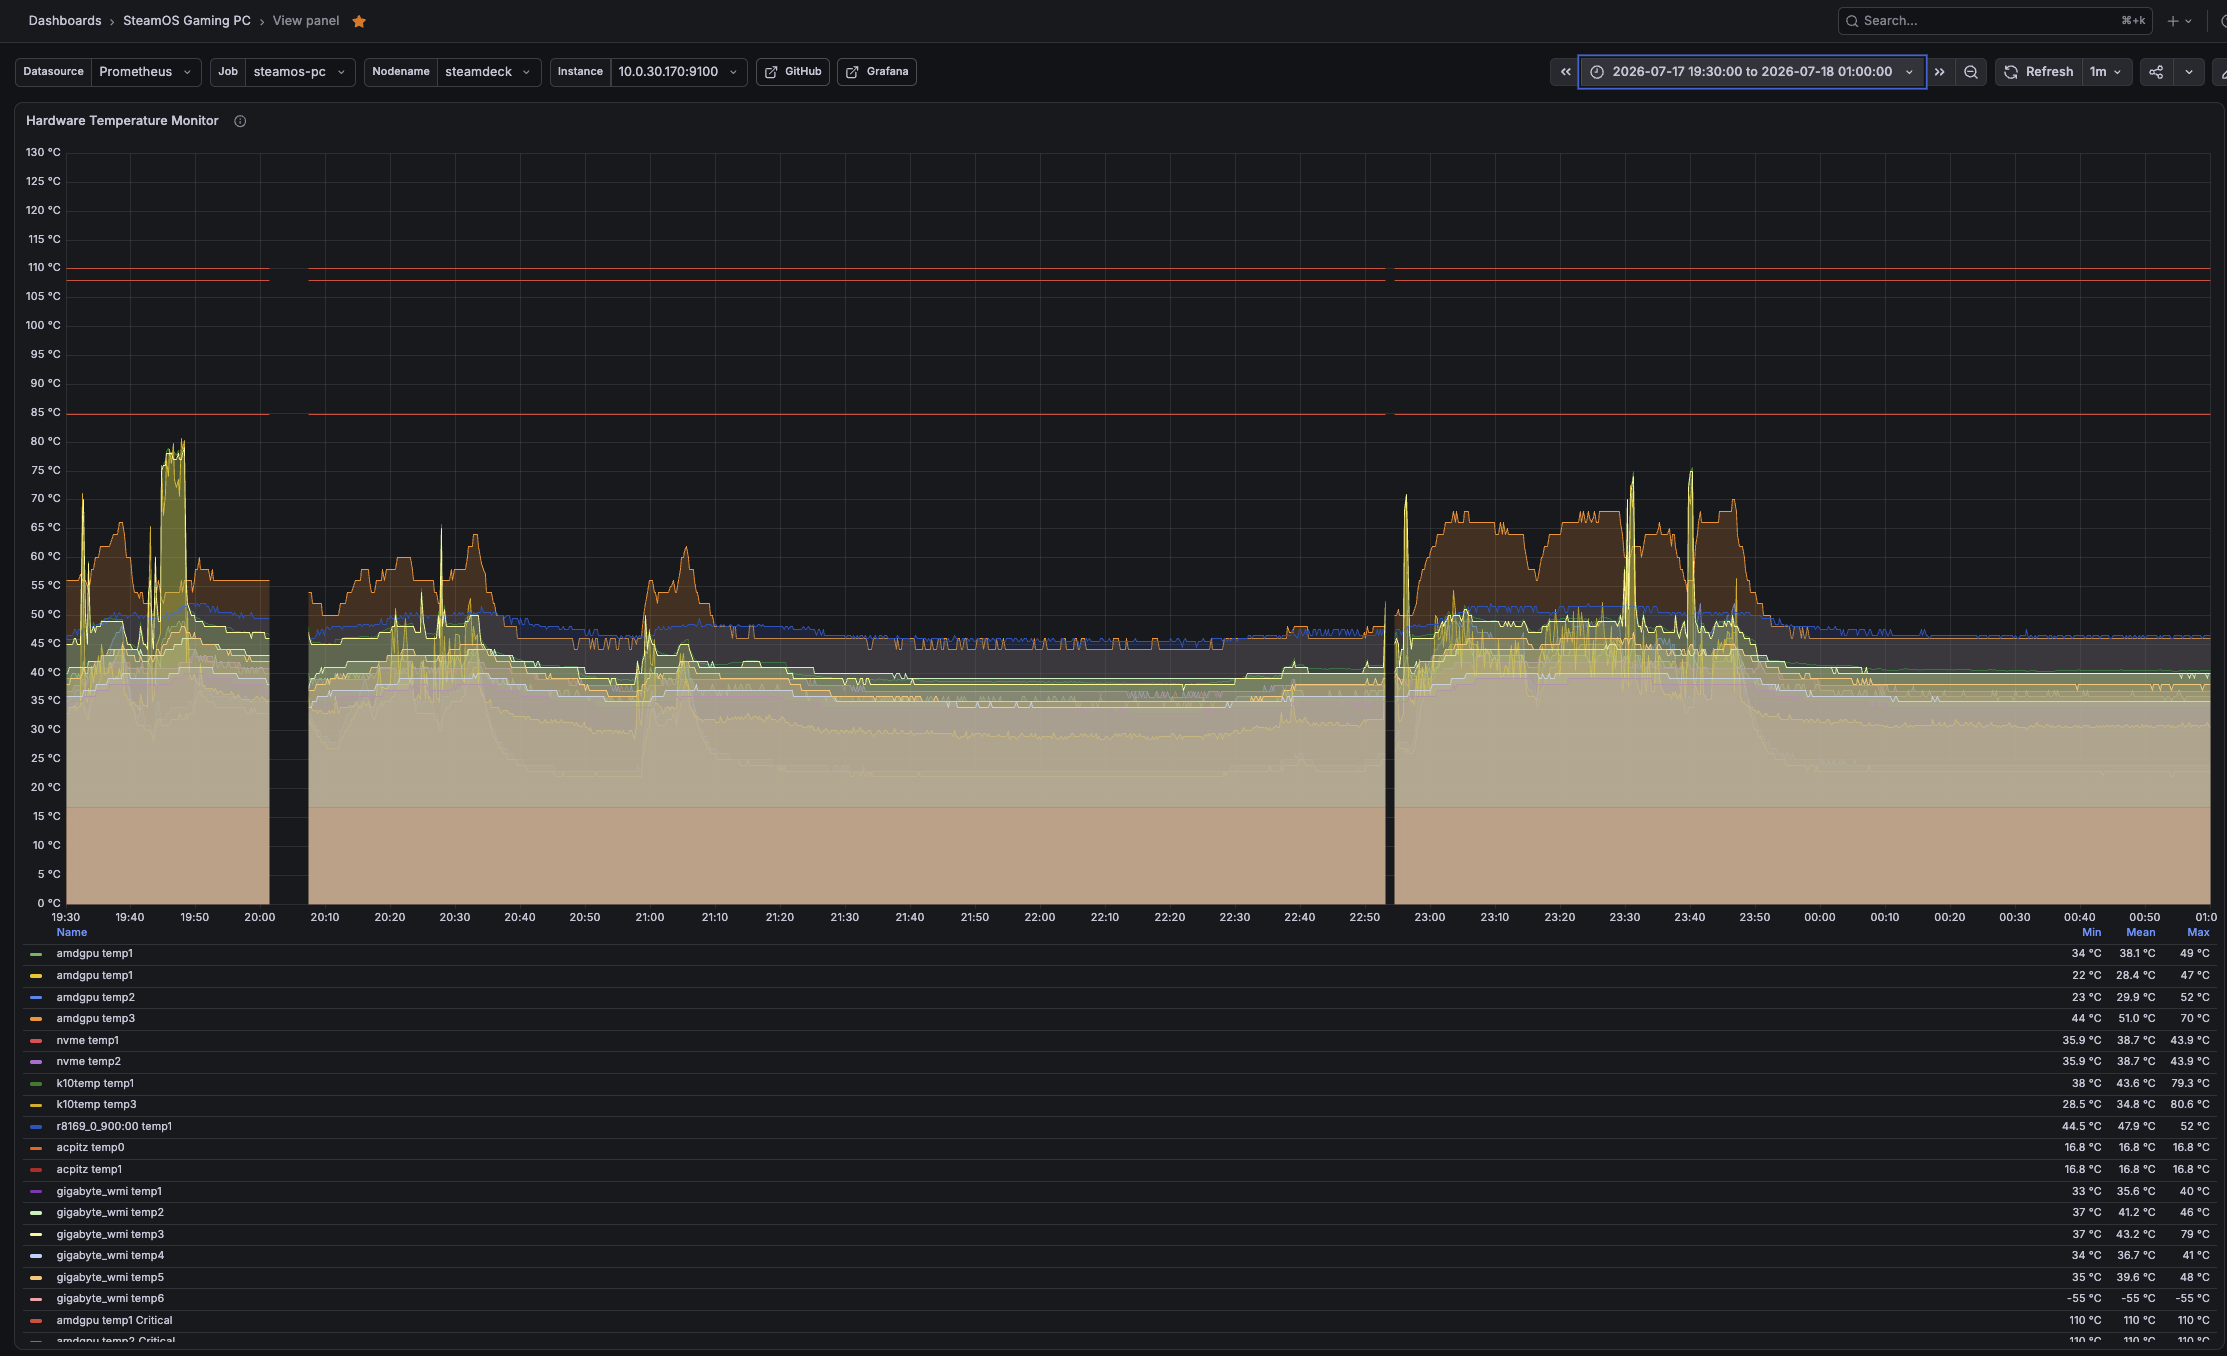
The chart above covers the evening of July 17th into the early morning hours (19:30 to 01:00). The moment worth calling out is 7:47 PM CT: that’s when a game was compiling new shaders and CPU utilization spiked past 90%, the heaviest load this machine has seen in any of my testing. Temps held steady. No throttling, no drama, just the fan doing its job.
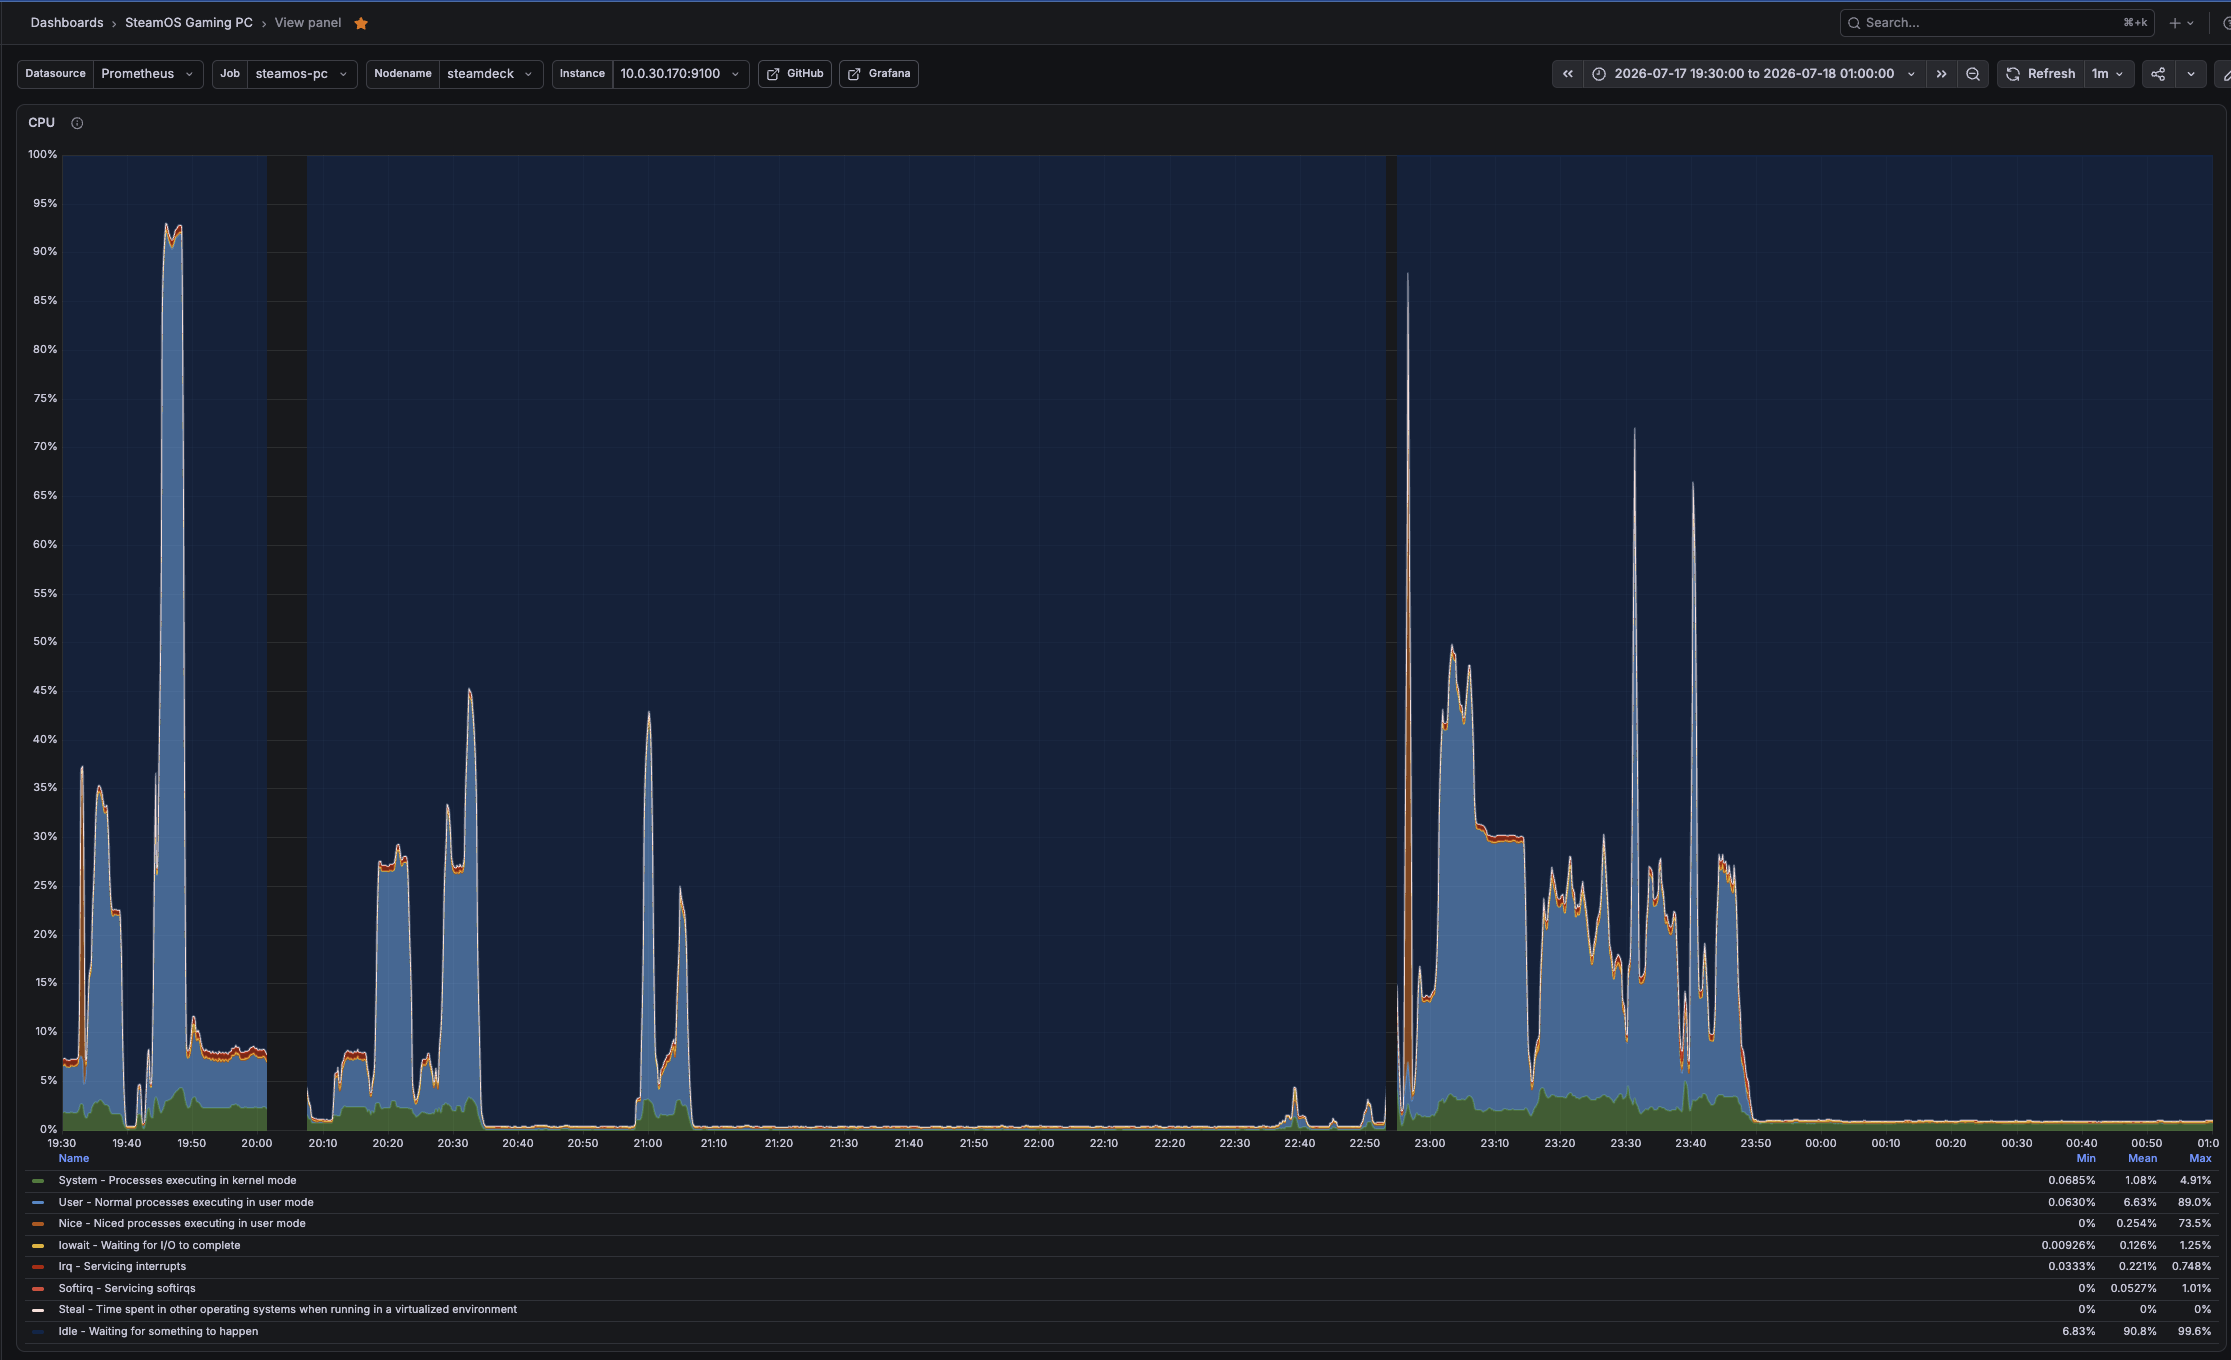
For context, the original 93°C incident happened at 40-44% utilization. This session more than doubled that load on an uncapped chip and never got close.
The saga, in one table
| Configuration | Load | Peak temp |
|---|---|---|
| AXP90 X53, stock settings | 40-44% | 93.1°C |
| AXP90 X53, Eco Mode + PBO 70 | 50-70% | 75.4°C |
| AXP120-X67, stock settings | 90%+ | 80.6°C |
If you’re fighting thermals in a Fractal Ridge or a similar SFF case, my order of operations stands: try the free BIOS route first, it genuinely works. But if you want the chip running unrestricted, a well-chosen low-profile cooler (mounted with intent, not just installed) is what actually closes the case. Pun fully intended, and series concluded.