The problem with streaming in 2025
When Netflix launched its “Watch Now” streaming feature in 2007, it revolutionized how people consumed television and film. For one monthly fee, you could watch your favorite shows and movies. Netflix Watch Now required no contracts or physical media, and there were no limitations on where, how, or how often you watched. It was simple and affordable.
Fast forward to 2025, and streaming has become increasingly frustrating. On one hand, the competition amongst platforms has created better content with higher quality writing. However, it has also introduced several major drawbacks:
- Everything Everywhere All at Once (Except What You Want):
- Content has moved from a single platform in Netflix, to being split amongst multiple services like Amazon Prime Video, Apple TV+, Paramount+, Max, Disney+, and others. Each service has a subscription fee (that rises every year), and using even a few can easily push your monthly bill into the triple digits.
- You Own Nothing and You’re Supposed to Be Happy
- Streaming content is routinely removed from a service for licensing changes or tax write offs. Even the content you’ve purchased is not safe!
- Buying digital media from a streaming service doesn’t grant you ownership; it grants you a license that can be revoked at any time.
- Streaming content is routinely removed from a service for licensing changes or tax write offs. Even the content you’ve purchased is not safe!
- The Specialer Edition Strikes Again
- Streaming gives studios the ability to modify content long after release, often without notice. The original Star Wars trilogy has been repeatedly edited, with scenes changed or added in ways many fans disagree with, and the unaltered versions are no longer available via streaming. Similarly, The Godfather Part III was re-edited decades later into The Godfather Coda: The Death of Michael Corleone, presenting a different structure and tone. While creative revisions can be interesting, it’s troubling for me to pay for one movie on a service like Amazon Prime Video, only to find it effectively taken from me later in the form of an edit.
- Revenge of the Ads
- People paid for streaming in part to escape advertisements, but over time, advertisements have creeped back into even paid subscription tiers. I remember the first time I saw an ad play before watching an episode of Star Trek Discovery on Paramount+ (which I pay for!) and being livid.
In response to these trends, many technically inclined users have begun reclaiming control over their media, including me. Instead of paying for access to content I might lose tomorrow, or be forced to watch with ads, I control my own media library. No altering the deal of license agreements. Just content I’ve bought, organized, and backed up myself.
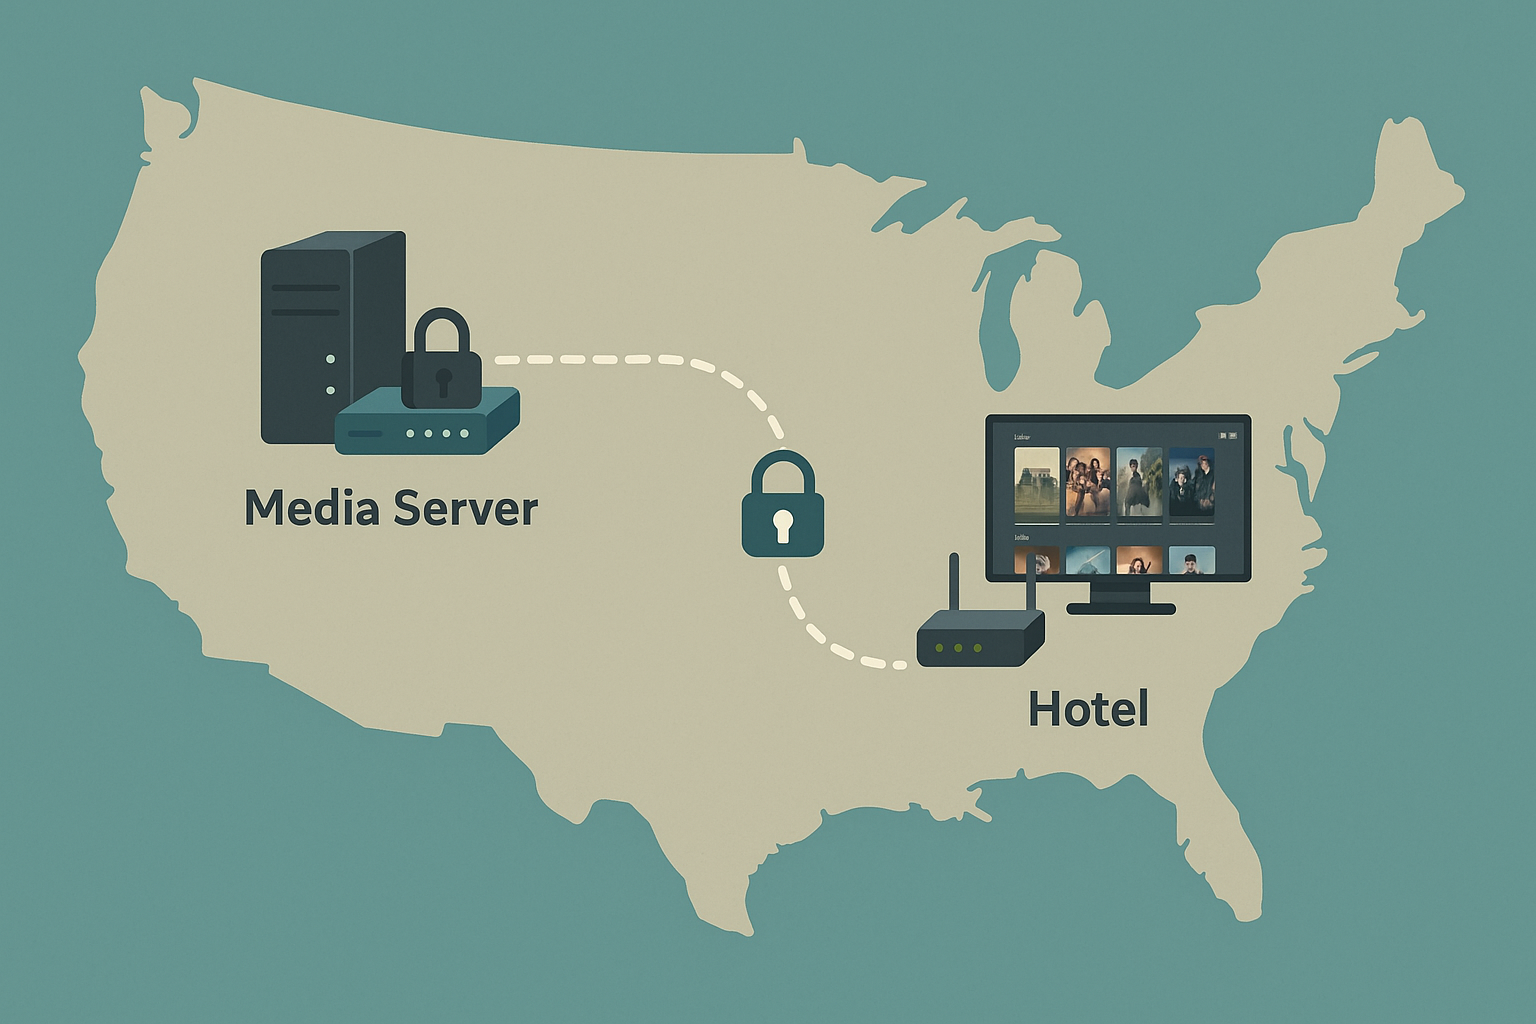
However, ownership is only part of the story. The outcome I really want is to securely and reliably access my content from anywhere, whether I’m relaxing at home, stuck in a hotel room across the country, or even on a plane. That’s where my setup comes in: Jellyfin handles the media, WireGuard provides secure remote access, and a Beryl AX travel router makes connecting on the road as simple as plugging in.
Accessing Home Services on the road with Wireguard
If you’re going to self-host your media, you need a secure way to access it from anywhere, especially when you’re not at home. That’s where WireGuard comes in. WireGuard is a modern VPN that’s fast, lightweight, secure, and reliable.
Configuration of Wireguard is simple; all you need is a few keys and a small config file; there are no bulky clients. Once it’s running, it quietly gets out of the way and just works.
I won’t go into every step of setting up WireGuard on a Raspberry Pi; plenty of excellent guides already do that (An example being this one from Kevin McAleer). What’s worth noting is just how minimal the setup really is. In my home lab, I’m running WireGuard in a Docker container on a Raspberry Pi. My WireGuard server is configured to support 10 peers (for my devices and a few spares), uses my local Pi-hole DNS server for ad-free browsing on the go, and automatically determines my external IP address. It hasn’t needed attention in months, aside from an occasional container image upgrade.
All configuration and client files live under ~/wireguard (or in my case, ~/docker_volumes/wireguard/config as it’s running in a container), and each peer gets its own config folder like ~/wireguard/config/peer1/:

Here’s an example of what the container deployment looks like:
docker run -d \
  --name=wireguard \
  --cap-add=NET_ADMIN \
  --cap-add=SYS_MODULE \
  -v /home/pi/wireguard:/config \
  -e PUID=1000 \
  -e PGID=1000 \
  -e SERVERPORT=51820 \ #The UDP Port on which Wireguard listens for Client Connections
  -e PEERS=10 \ #Maximum Number of Wireguard CLients
  -e PEERDNS=1.1.1.1 \ #Default DNS Server for Wireguard Clients
  -e SERVERURL=auto \ #optionally replace with your public IP address/DNS hostname
  -e TZ=America/Chicago \
  -p 51820:51820/udp \
  --restart unless-stopped \
  linuxserver/wireguard
That’s the entire setup. WireGuard starts on boot, takes up almost no CPU, and quietly provides secure, reliable access to everything on my home network. When I’m on the road, I hand one of these configs off to my Beryl AX router, and it connects home without any extra work on my part.
My Travel-Ready Setup: GL.iNet Beryl AX Router
While I can (and sometimes do) use a WireGuard client on individual devices to reach my home network, I’ve started traveling with a small, purpose-built device known as a travel router. Travel routers offer several practical advantages:
- Bypass device limits on paid Wi-Fi
- If a hotel or airplane charges per device for a internet access, the travel router becomes the one device I am pay for. It then shares that connection with all my other devices over its own private Wi-Fi network. This is especially useful for families or anyone carrying more than one device.
- Create a private LAN
- Most hotel Wi-Fi networks isolate guest devices for security (which is a good thing!). A travel router creates a private LAN for your devices, allowing you to share media and other files between them.
- Run a built-in VPN client
- Most importantly for this post, the travel router can run as a WireGuard (or OpenVPN) client, connecting all devices to the internet and/or your home network through a secure tunnel. In effect, each device can browse the internet securely without requiring a VPN client to run directly on it.
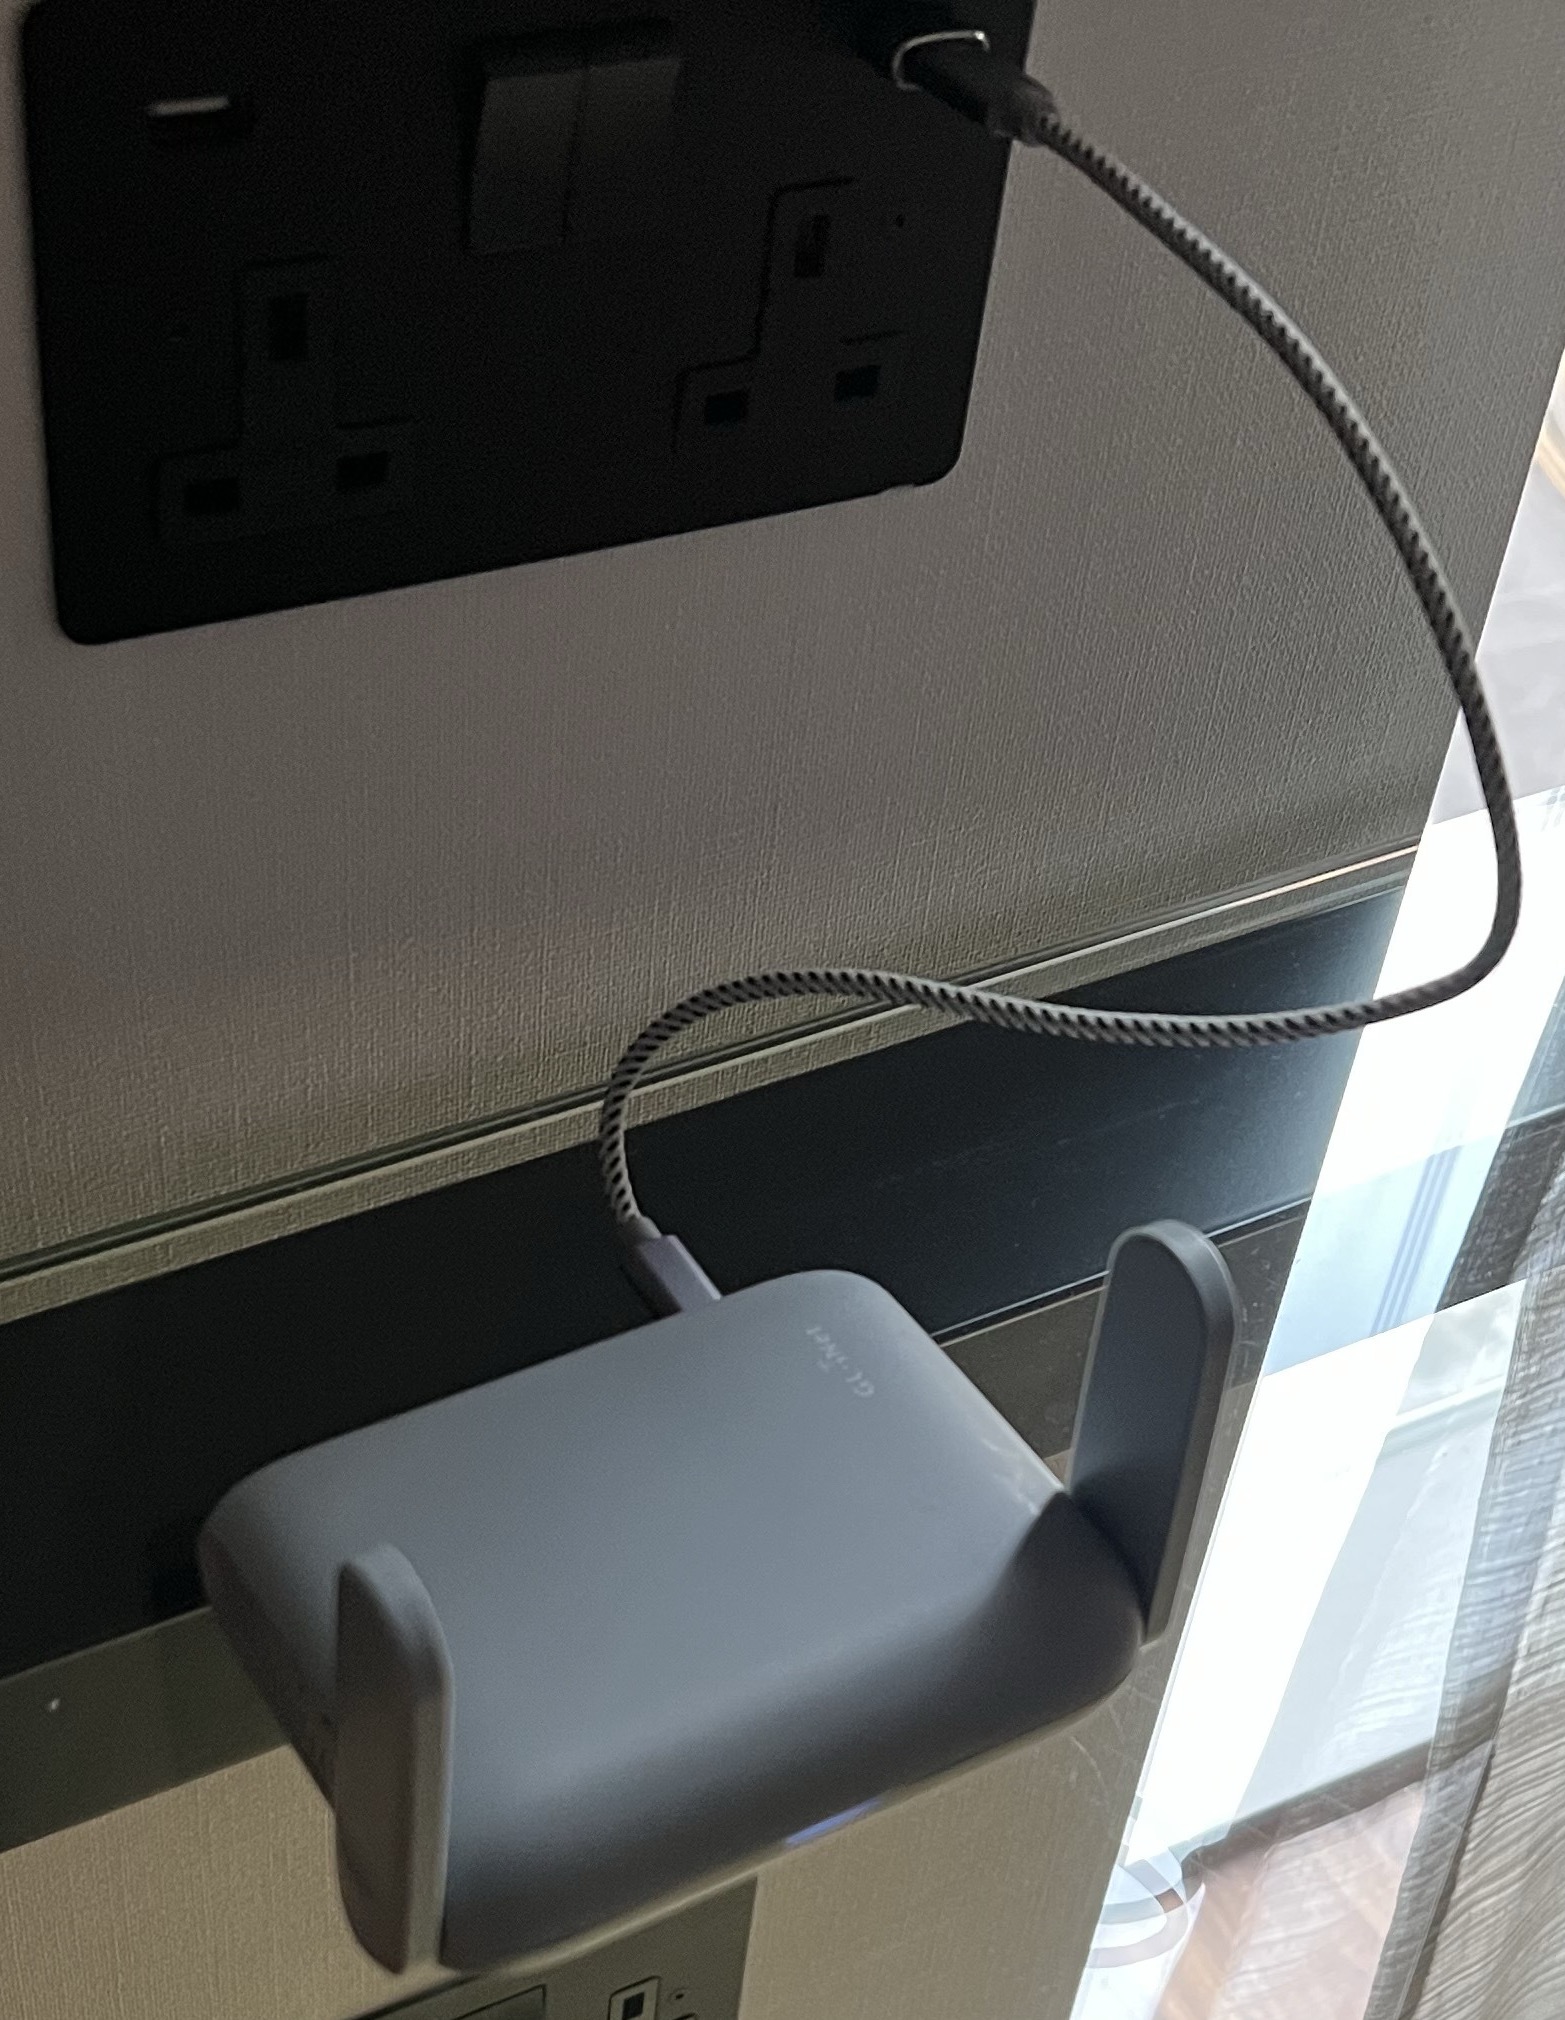
I use a GL.iNet Beryl AX Router (pictured above in a London hotel room) as the web interface is intuitive, configuration is mostly point and click, and it remembers all of my VPN and Wi-Fi settings.
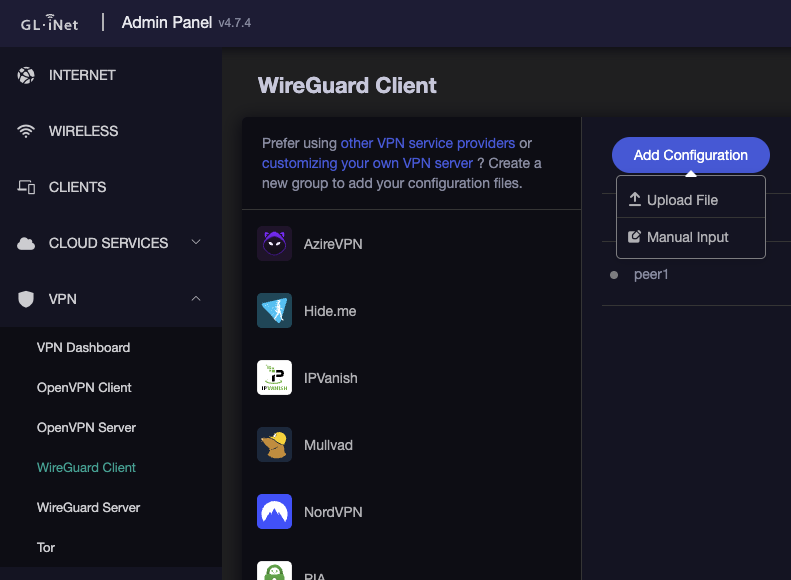
Configuring the Berl AX router as a VPN client is as simple a process as uploading the peerX.conf file to the WireGuard Client config within the web interface:
Afterward, I toggle the VPN connection, and it will show a successful connection and traffic statistics:
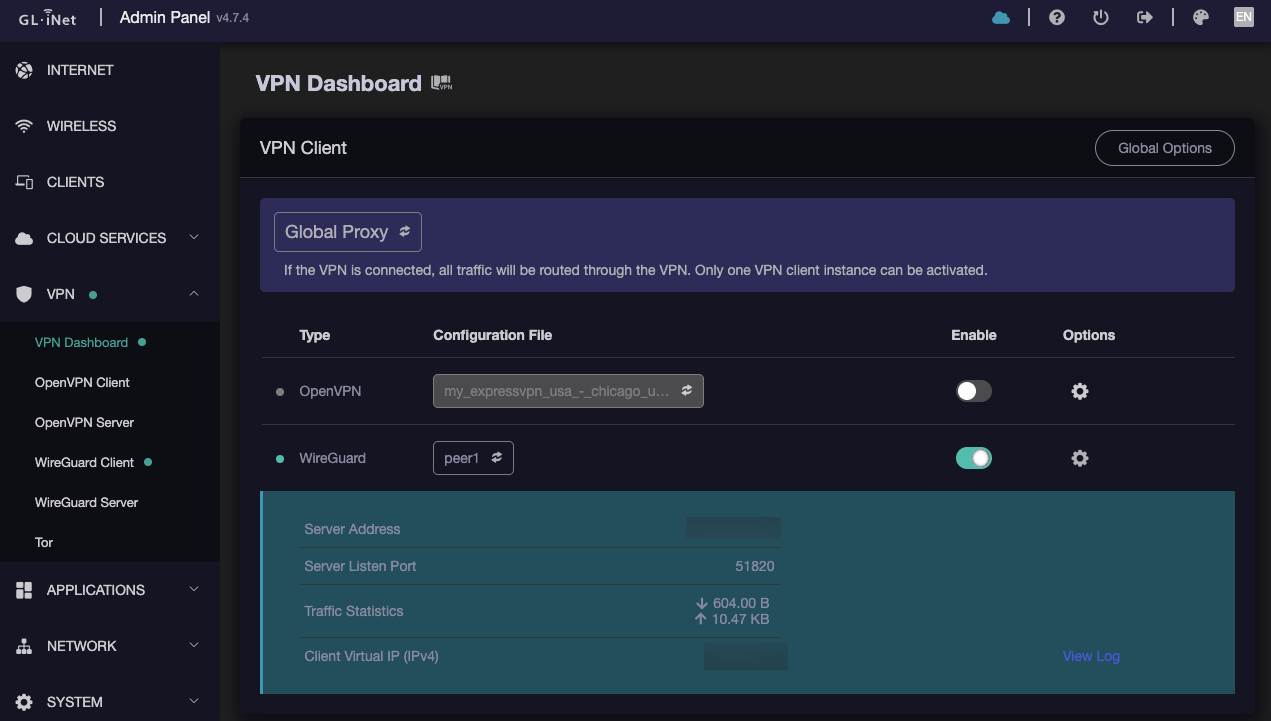
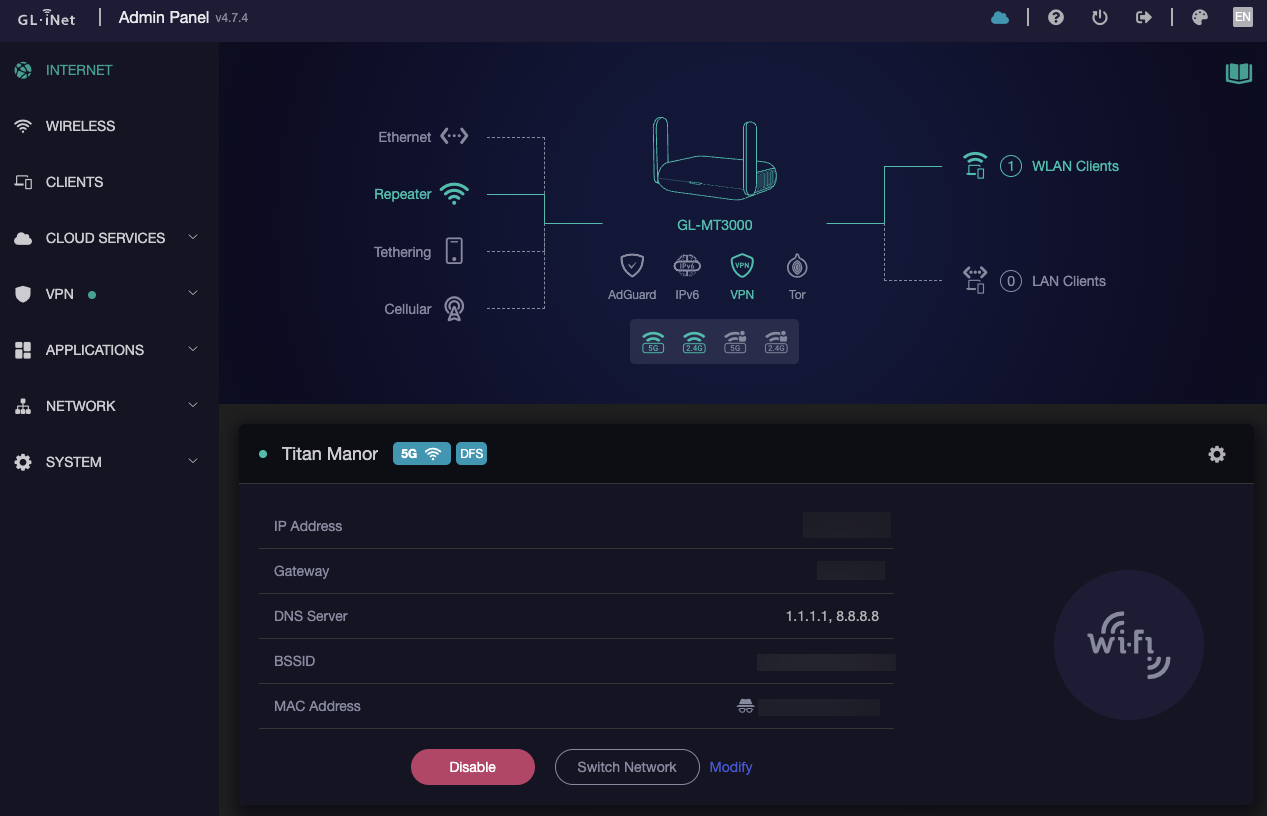
Backing out to the overview page shows relevant information, such as:
- Number of WLAN clients (end user devices) connected
- What Wi-Fi network the router is connected to (In this case, Titan Manor)
- VPN client status (the dot on the left and highlighted icon in the middle indicate VPN client is connected)
No matter where I am, I plug the router in, connect to the local Wi-Fi once, and I have secure internet access for all of my personal devices. When I connect my Amazon Firestick (which stays in my backpack) to it, I can use the Jellyfin App to stream my home media anywhere as if I were at home.
Jellyfin: Your Media, Your Rules
Now that I’ve covered securely connecting to my home network, it’s time to discuss the heart of this experience, Jellyfin. Jellyfin is a free and open-source self-hosted media server that provides a Netflix-like experience for streaming your media. I love using Jellyfin for several reasons:
- It’s supported by an active open source community that provides frequent updates and improvements.
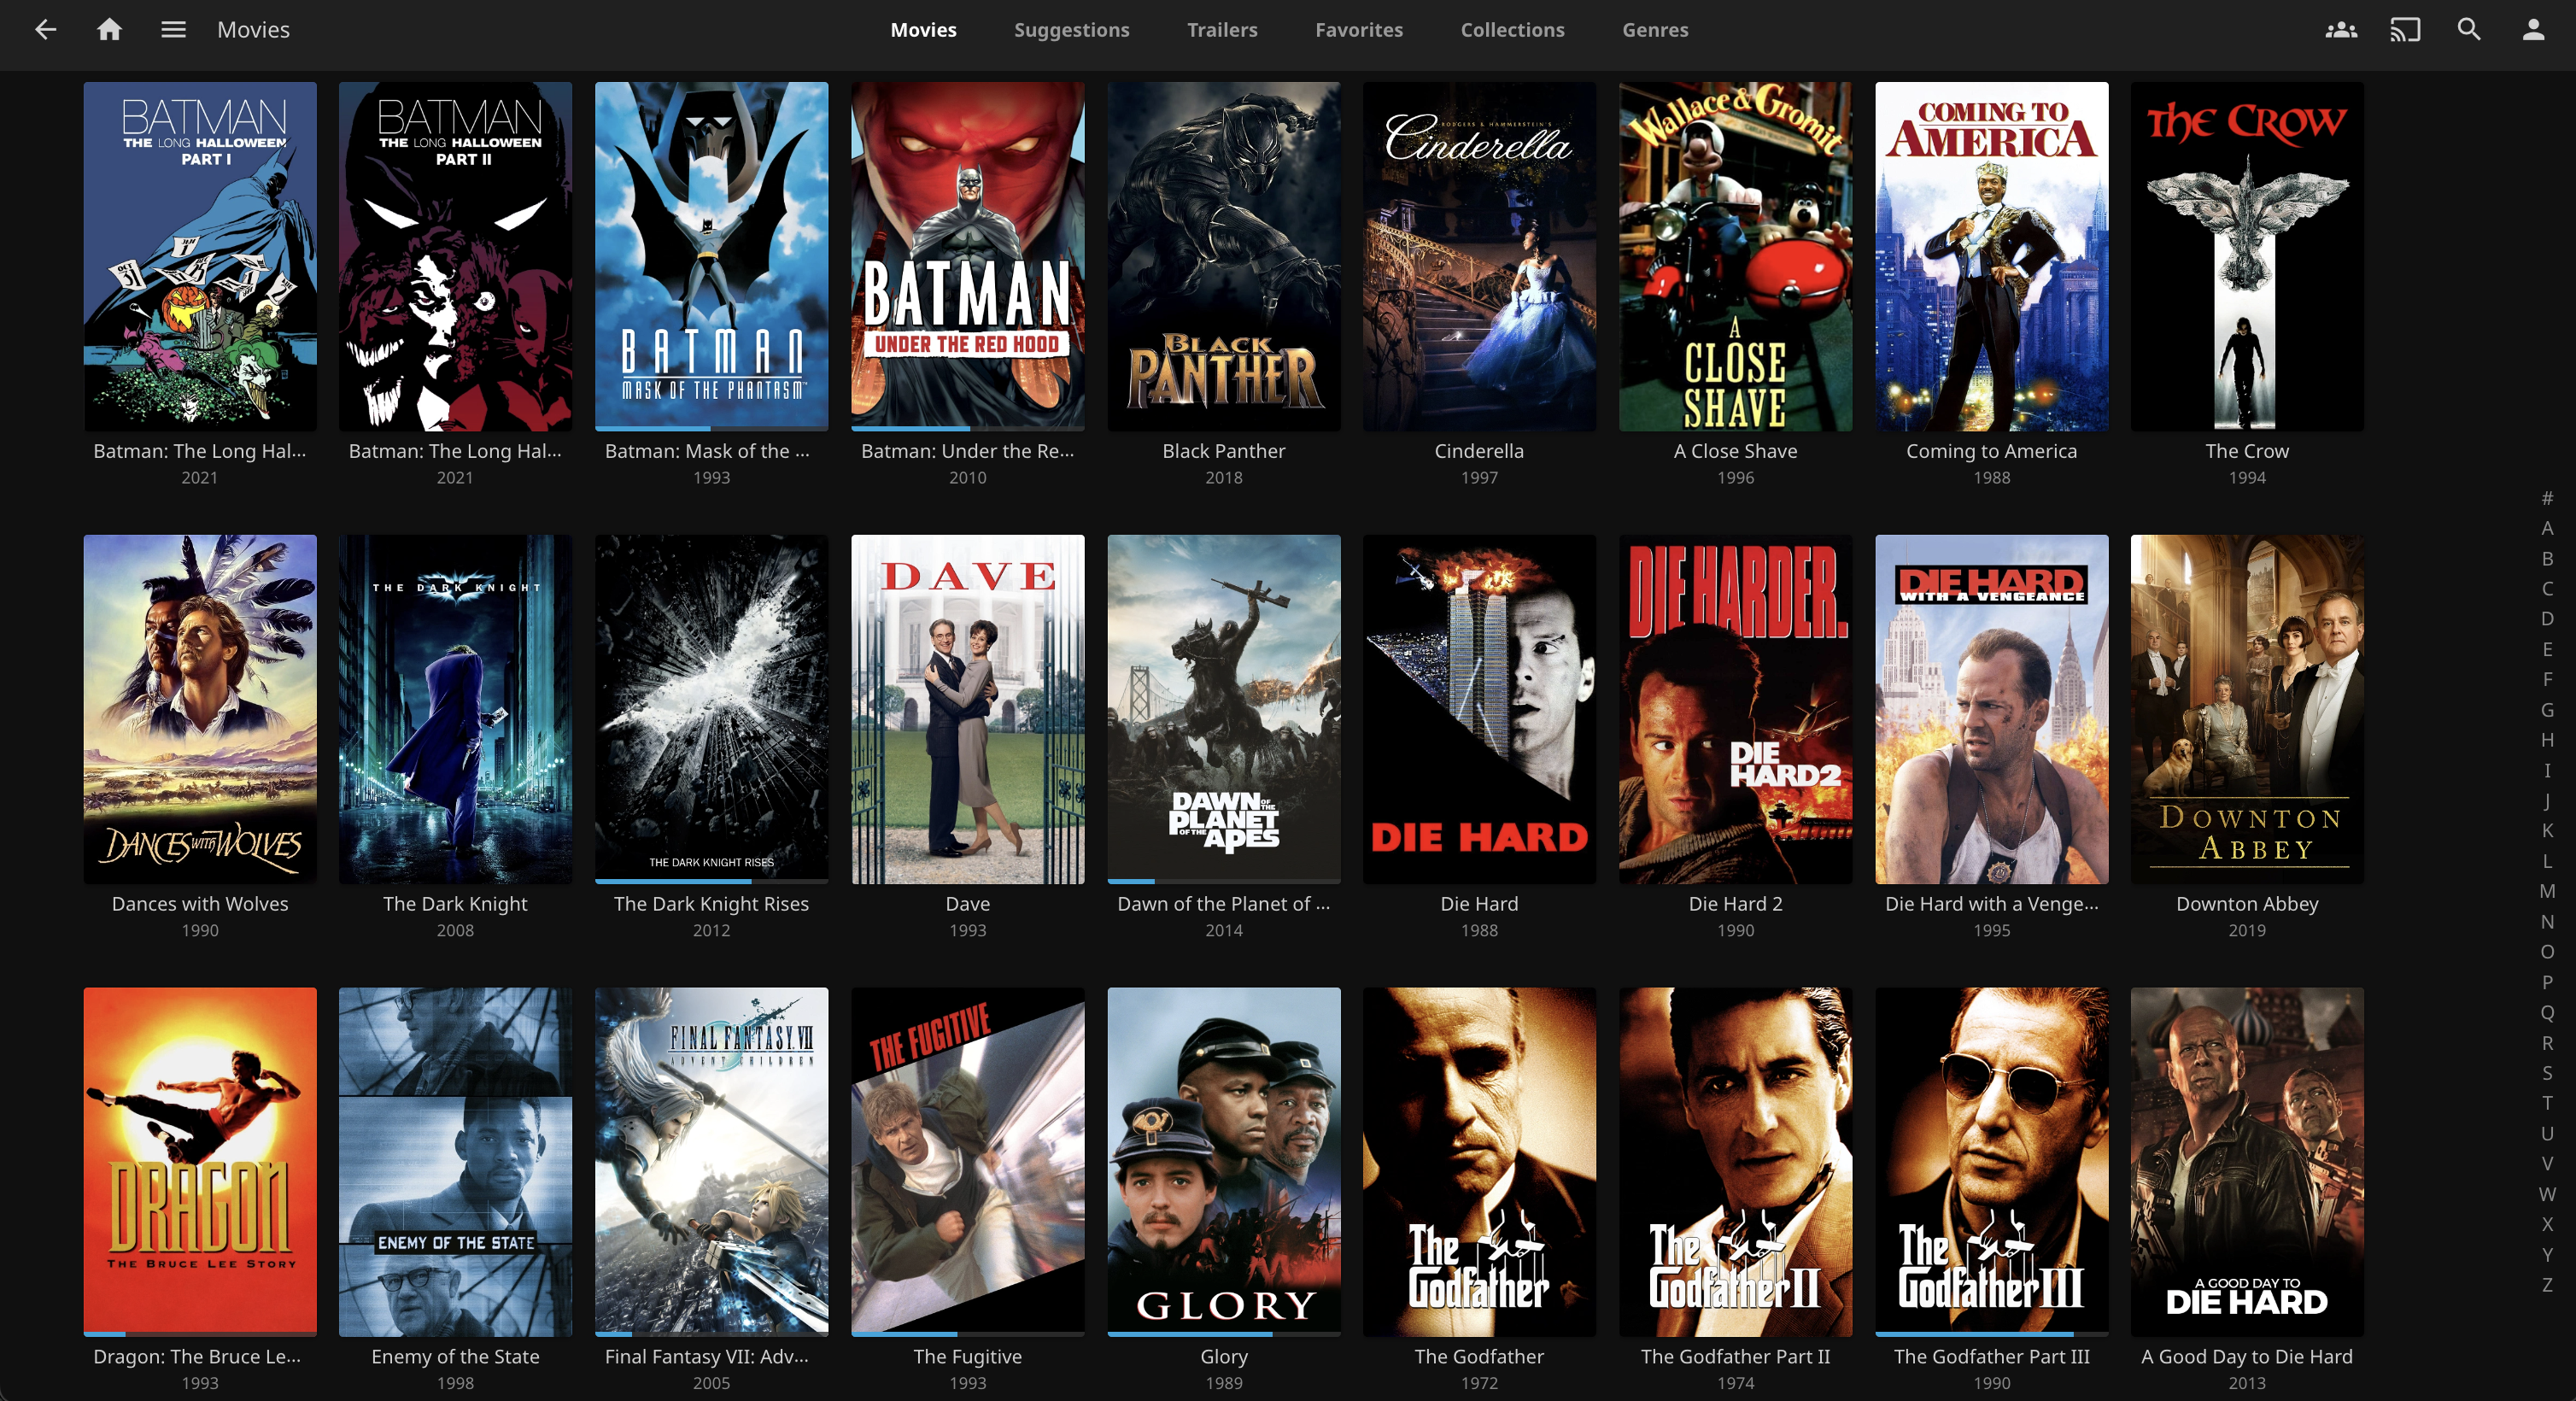
- I have yet to come across a platform for which there is not a Jellyfin Client application; I use the apps for iOS, Fire TV, and even my LG WebOS TV. I can also watch via a web browser on my computer or tablet.
- It lets me organize my media into Collections (for example, the Die Hard series or the Godfather Trilogy), Movies, and TV shows, that are easily searchable.
- Jellyfin automatically pulls rich metadata for movies and TV shows (posters, episode titles, cast info, and biographies), while giving me full control to customize anything, like swapping in a better looking poster or correcting details.
- I get to decide what media I want to host, what subtitles are included, the quality of the video, and nothing is ever removed unless I choose for it to be.
Right now, my Jellyfin server runs on a GMKtec Nucbox G3 Plus, a compact Windows mini PC with an Intel N150 CPU, 16GB of RAM, and a 1TB NVMe SSD. The PC handles local playback and 1080p streaming without issue and even does light 4K transcoding for remote sessions when needed.
The media itself lives on a Synology DS223j NAS (Network Attached Storage), equipped with two 14TB Seagate IronWolf NAS drives in an SHR (Synology Hybrid RAID) configuration, so that if one drive dies, I won’t lose my data. The NAS shares its library over SMB to the Jellyfin server via 1Gbps Ethernet. The NAS also handles other duties like automated backups and file sharing across my homelab.
One big advantage of this setup is that compute and storage are separate. The NAS holds the media, but the Windows PC runs the Jellyfin server application. At some point, I may choose to upgrade the PC to one with a more powerful CPU, NVIDIA GPU for hardware-accelerated transcoding, and all I’ll need to do is point it at the same NAS. For now, this setup does everything I need.
I should add that all of the media in my library is content I’ve personally purchased, either through Amazon or eBay. I use MakeMKV to rip my Blu-rays and DVDs into high quality MKV files, and then process them with HandBrake to strip out unnecessary audio tracks, subtitles, and reduce file sizes. A typical Blu-ray can shrink from 30GB down to about 3GB with no noticeable drop in quality. As of this writing, I have 87 films, and 19 television series, all of which consumes a bit over 1TB of a 14TB volume.

If you’re interested in setting up your own Jellyfin server and/or learning how to rip and transcode your physical media, I highly recommend Jeff Geerling’s excellent YouTube walkthroughs:
- Time to UNSUBSCRIBE from Disney+, Netflix, etc!: A thoughtful take on why self-hosted media is more appealing than ever.
- Better than Disney+: Jellyfin on my NAS: A step-by-step guide on setting up Jellyfin with a NAS and getting the most out of it.
Jeff covers everything, from required/recommended hardware, to ripping and transcoding workflows, and he even shows how to integrate Jellyfin with your home network. If you’re ready to start your self-hosted media journey, start there.
Road Warrior Mode: Watching Jellyfin on the Go
The magic happens when I leave the house after everything is configured: WireGuard on the Raspberry Pi, the Beryl AX travel router as the VPN client, and Jellyfin serving up media from home.
Here’s what a typical setup looks like when I’m on the road:
- I plug in the Beryl AX router and connect it to the hotel’s Wi-Fi.
- The router connects back to my home network automatically using a WireGuard VPN tunnel.
- Any device I connect to the router, which can include my laptop, phone, tablet, or my Amazon Fire TV Stick, behaves as if it’s on my home network.
- I plug my Amazon Fire Stick into the hotel TV’s HDMI port, which is accessible most of the time.
- In the few cases where the HDMI port is not accessible, I can always fall back to my tablet or laptop computer.
I can use the Jellyfin app on my Fire Stick exactly as I would at home. There is no need to set up port forwarding, no public exposure, or degraded video quality. Just full-resolution streaming from my own library, over a secure connection, to whatever screen is in front of me:
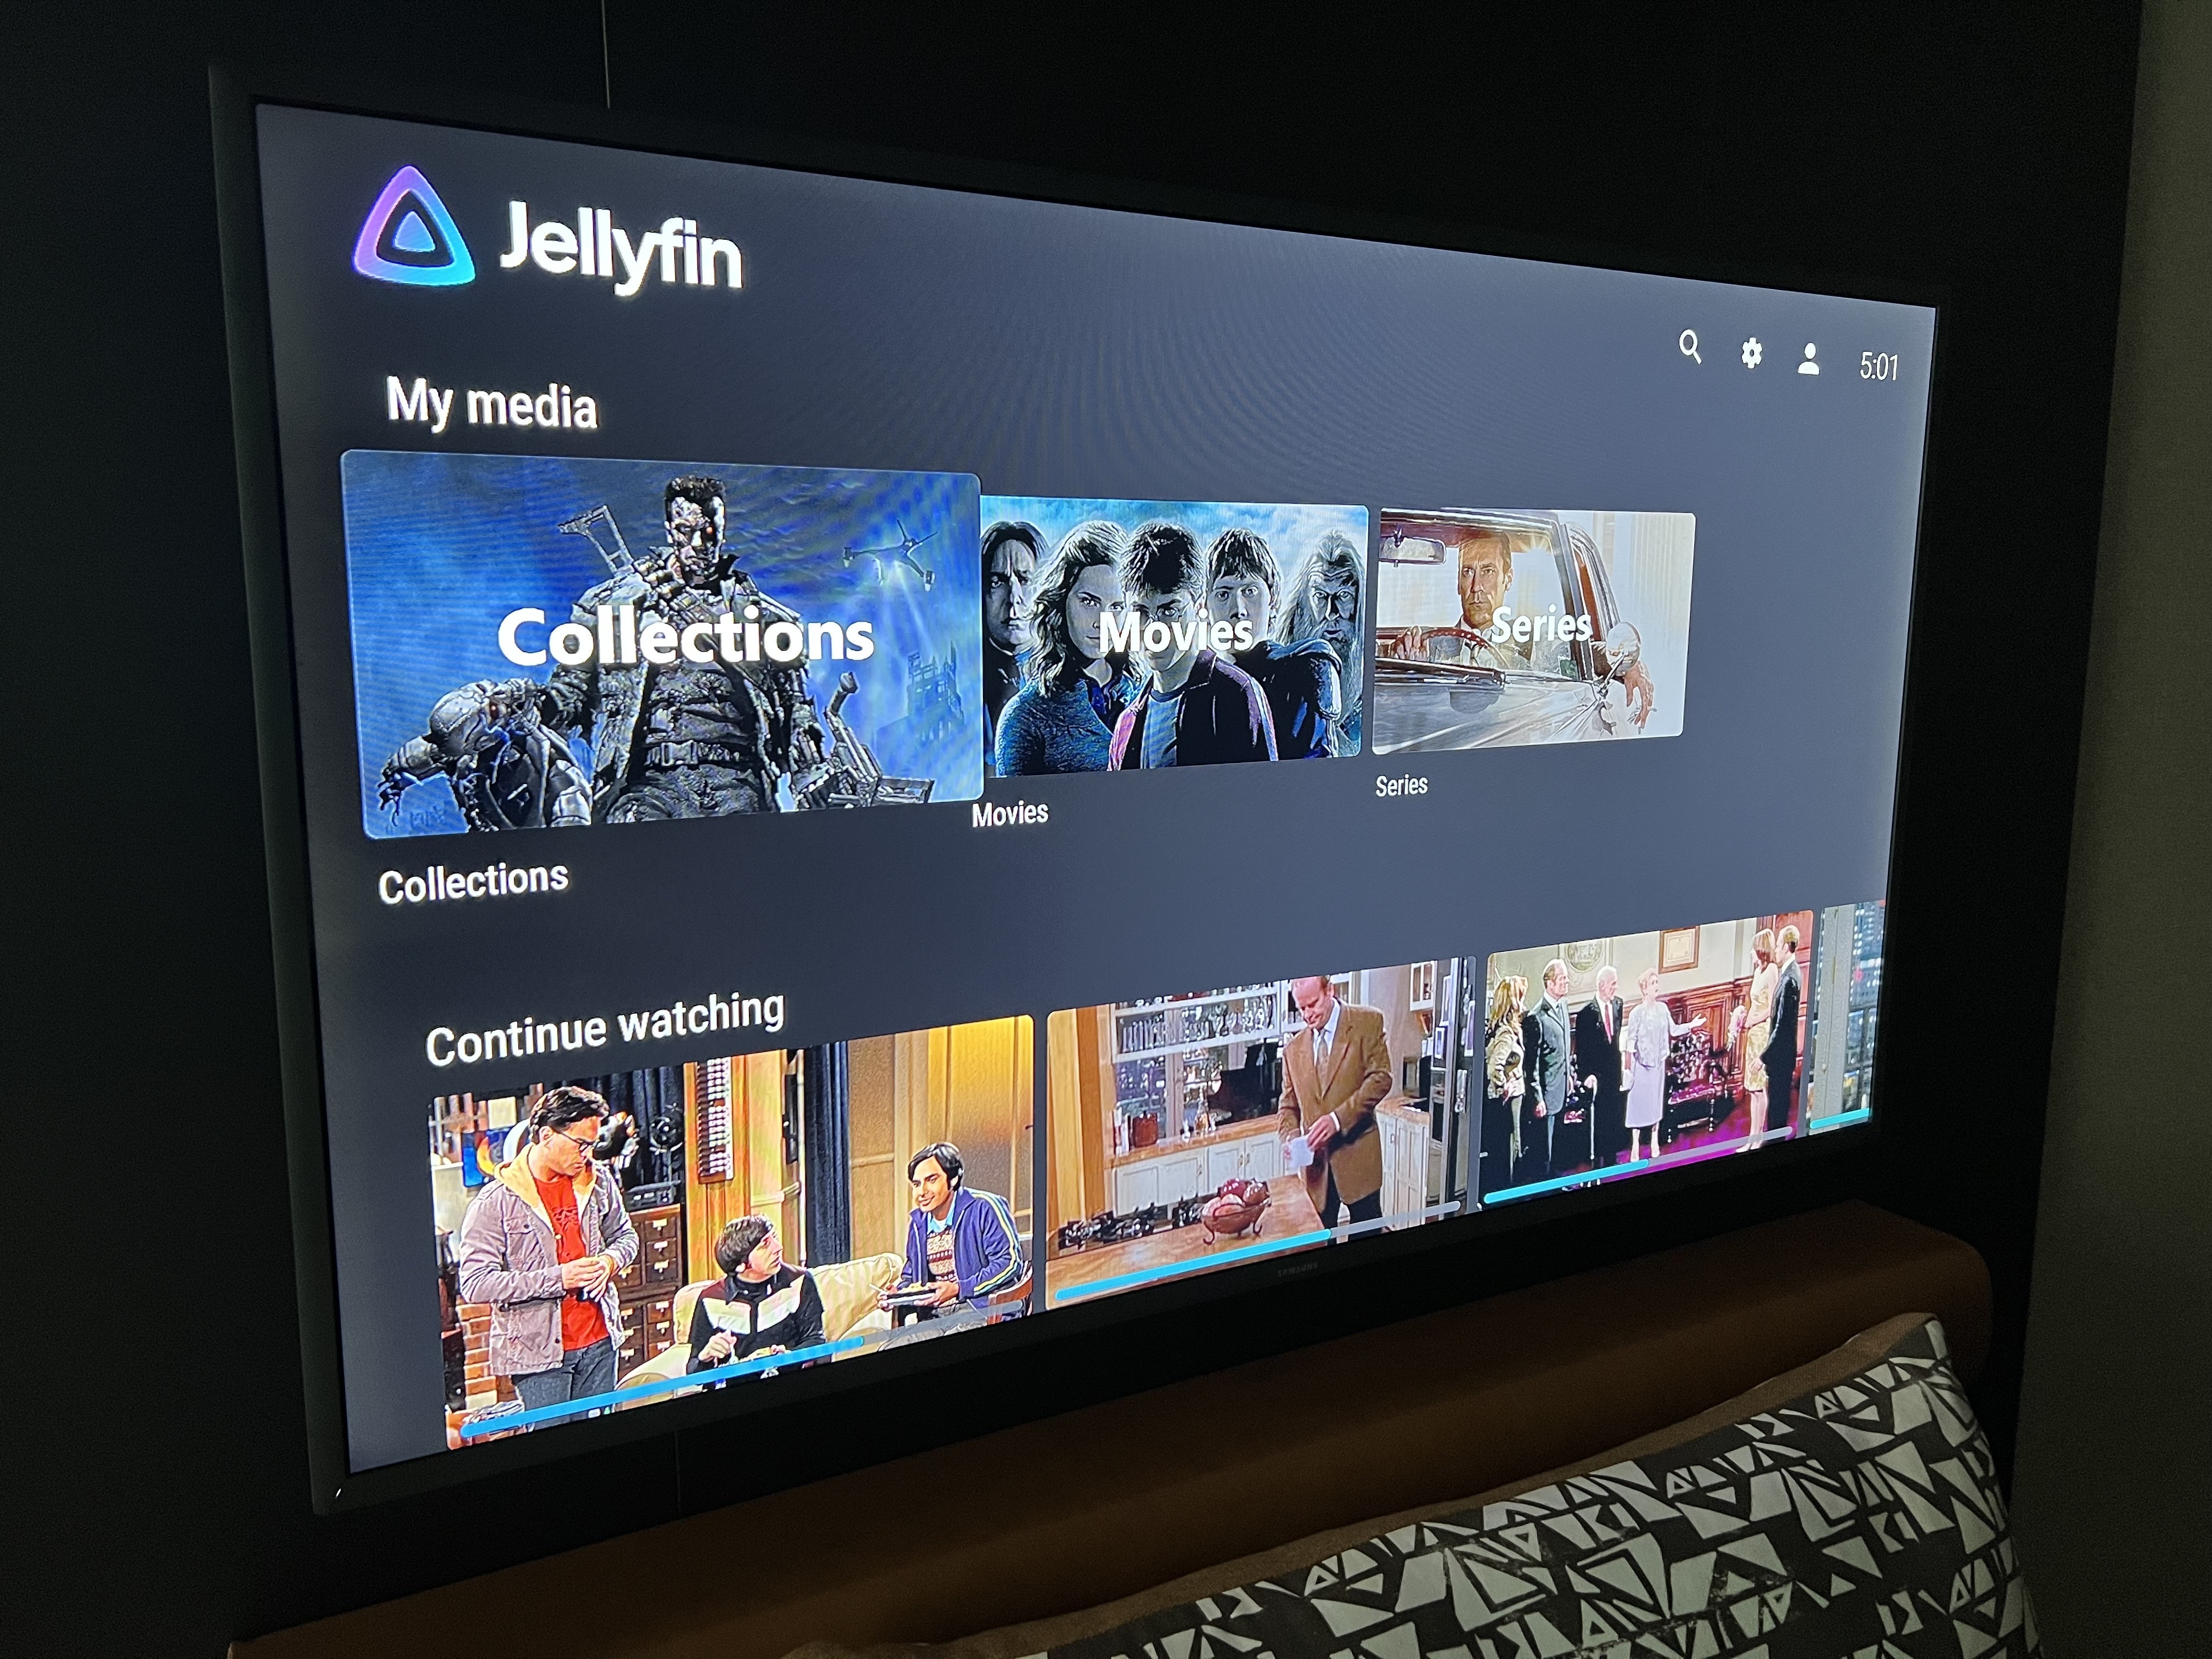
…in a hotel room…
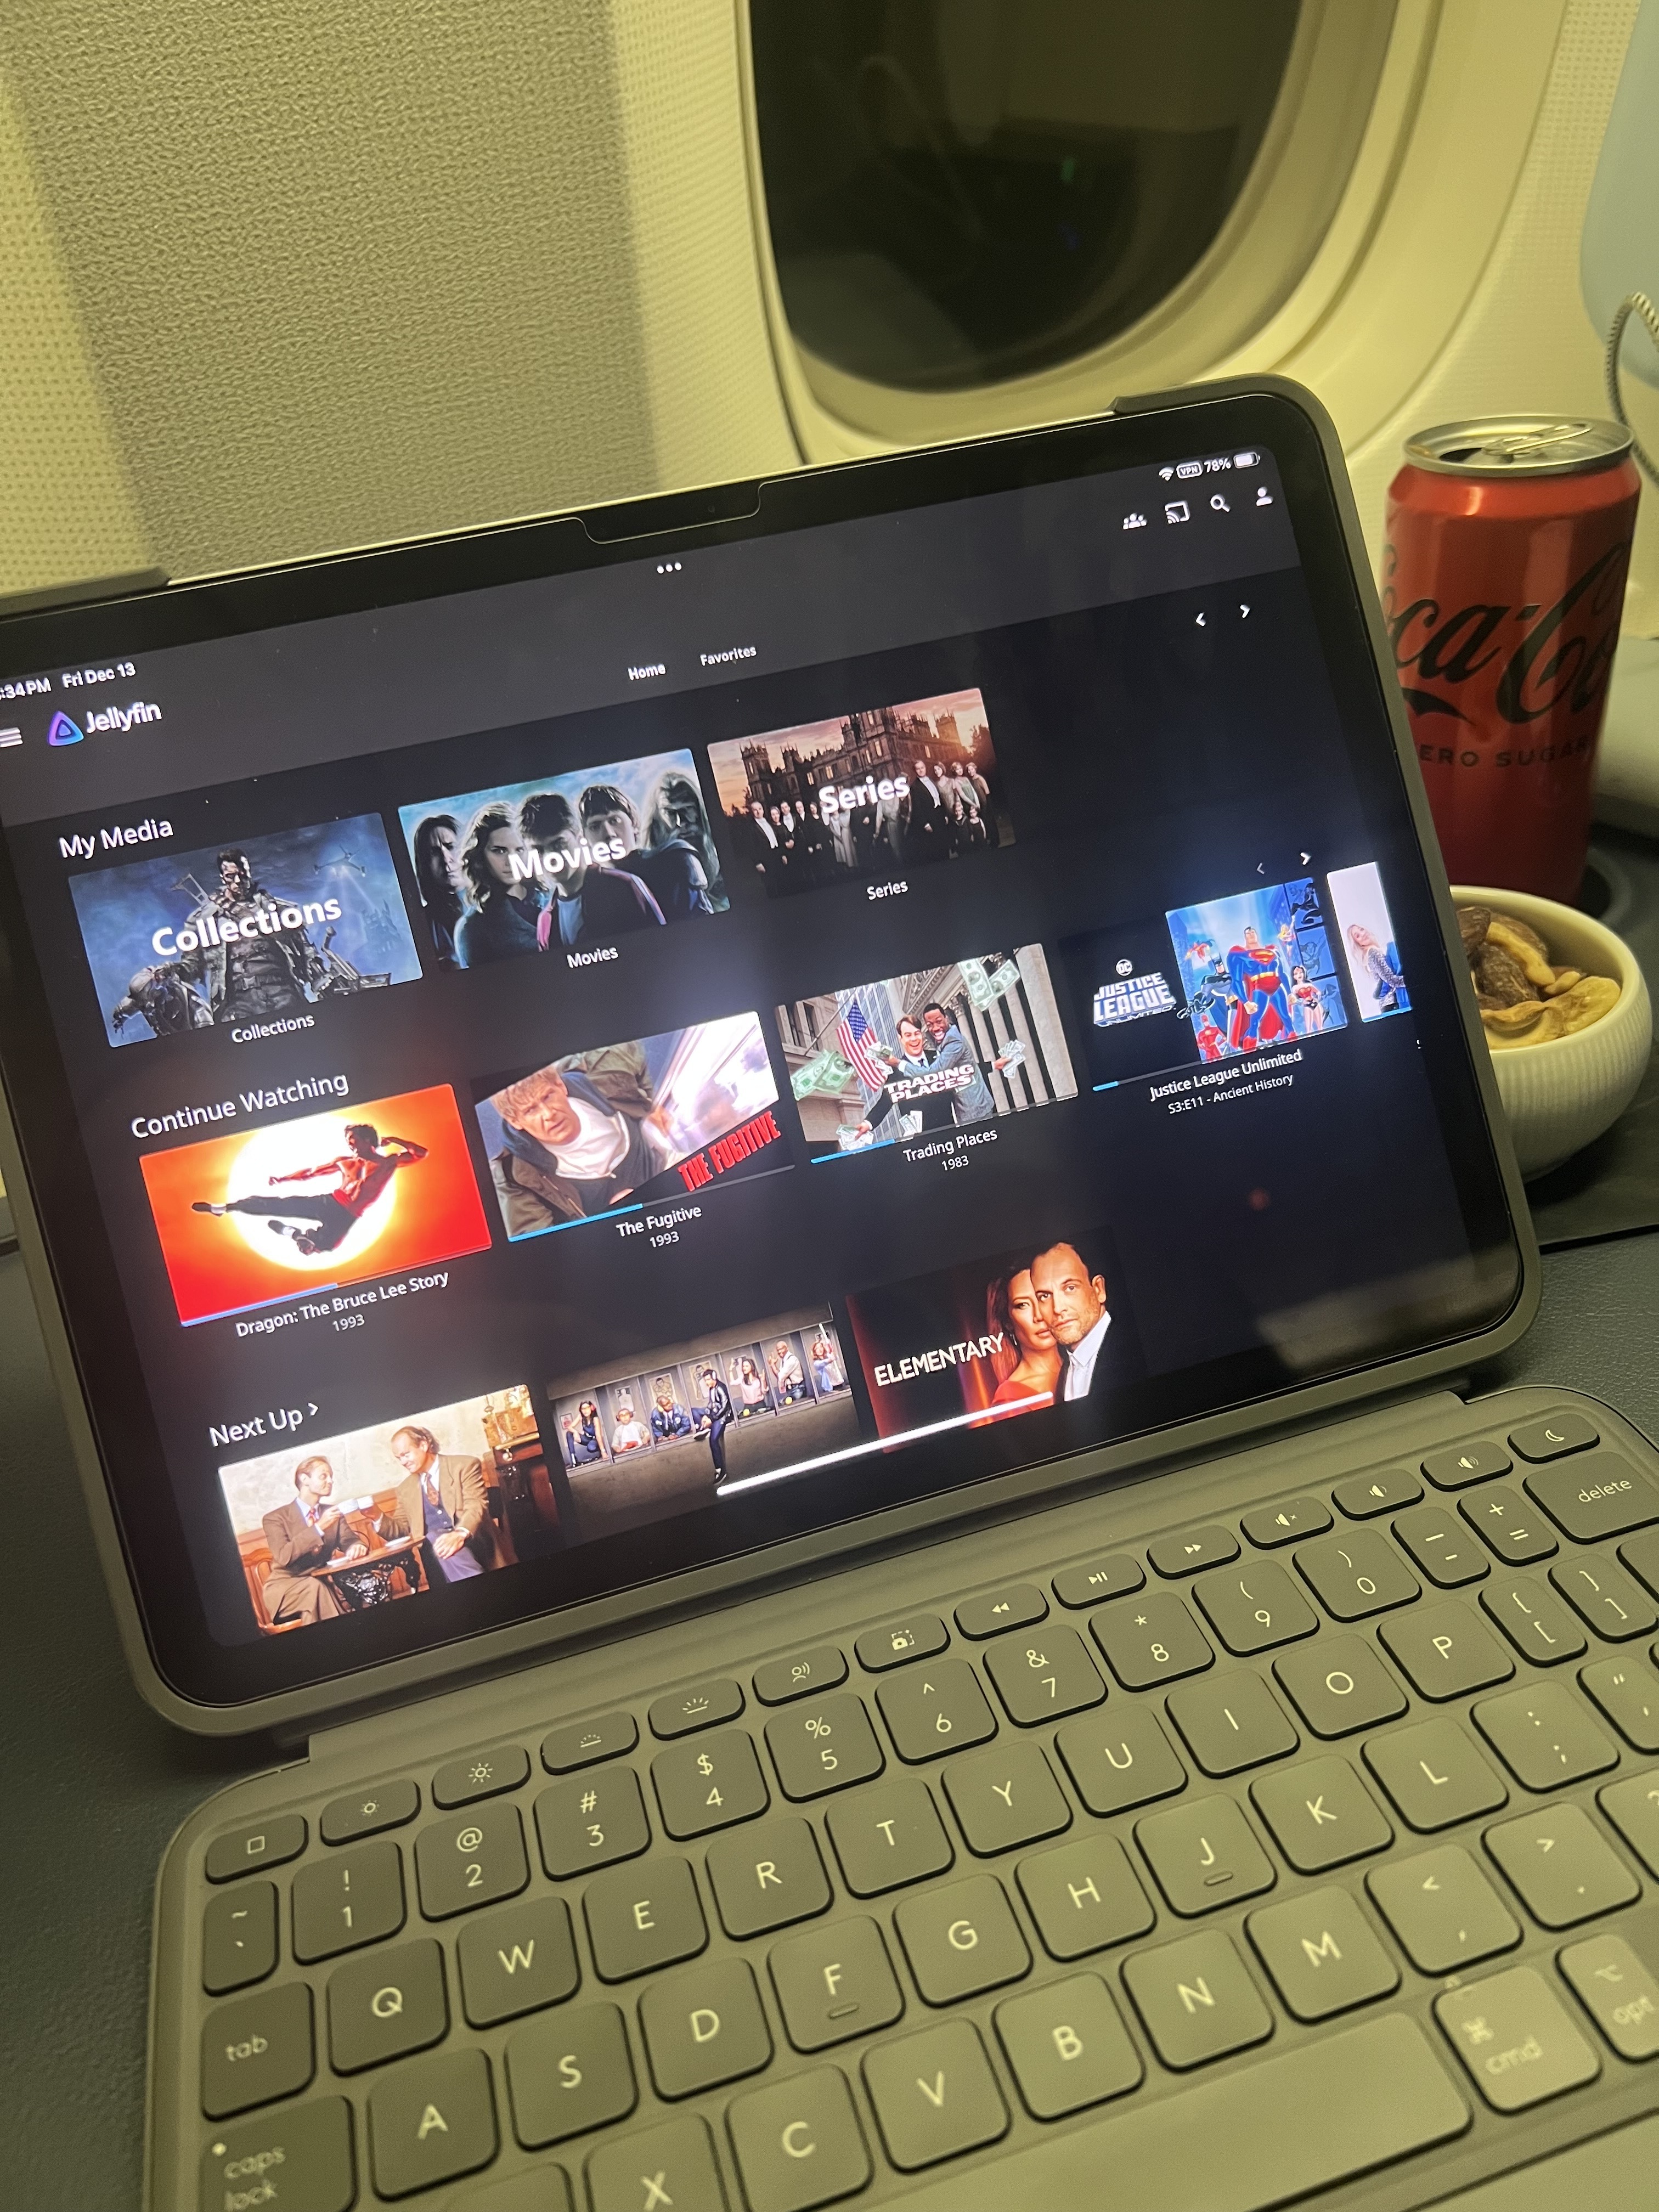
…or even in the air!
In both cases, the device is already logged into Jellyfin and sees the Jellyfin server over the WireGuard tunnel. It just works.
Benefits and Final Thoughts
This setup didn’t happen overnight, but now that it’s dialed in, I rarely think about it. And that’s the point.
Here’s what I get out of it:
- Seamless access to my entire media library from anywhere.
- Full ownership and control of my media: No disappearing titles, no surprise edits, no ads.
- Privacy and security: All remote access is tunneled through WireGuard, with no services exposed to the public internet.
- No recurring or rising costs: Aside from purchasing compute/storage/networking hardware, and the media I want to keep, this setup has no recurring subscription fees.
- Scalability and modularity: Because I separated compute (Jellyfin server) from storage (NAS), I can upgrade either independently as my needs evolve.
More importantly, this setup gives me the experience I thought I was getting when I first signed up for streaming services: perpetual access to the media I care about, whenever and wherever I want it, on my terms.
If you’re technically inclined and tired of the streaming shuffle, I highly recommend trying this approach. With tools like Jellyfin, WireGuard, and a solid travel router, private media streaming isn’t just possible. It’s better than what we’re paying for.
Next Steps and Resources
If you’re ready to dive into self-hosted media, here are some tools and resources that helped me get started:
- Jellyfin – The media server that powers my library.
- WireGuard – Lightweight, fast, and secure VPN tunnel.
- GL.iNet routers – Filtering by “Travel Router” will result in several great options for portable internet and VPN access.
- MakeMKV – For ripping Blu-rays and DVDs into MKV files.
- HandBrake – For compressing and cleaning up video files post-rip.
- The Best NAS for Most Home Users – A wirecutter article that offers some great NAS options for homelab use.